
Tutorial: AS3: How to Blit an animation from a tile sheet embedded at compile time
Today we are going to look at how to use a tile sheet embedded into an AS3 project at compile time.We will cover the embedding, instantiation, and actual usage of the tile sheet to do a simple blit canvas animation. I am currently working on a scrolling re-make of the classic Atari 2600 game, Sky Diver. I have started to create my own simple 8-bit styled tile sheet for the game. I only have the first three preliminary tiles created for the player sprite’s free-fall animation. Here is the tile sheet so far:
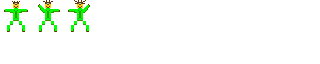
The sheet is actually 10 tiles wide (320 pixels) by 2 tiles high (64 pixels). The tiles are 32×32 in size. We are only using three tiles so far, but there is room for many more if we need them. We will start to build a simple class that will demonstrate using this sheet for animating the character using a classic blit technique. This technique will use a background fill to wipe clean the entire screen between animation frames. Much of the theory behind this was covered in this basic blitting tutorial, so I will not repeat it here. What we will do is go through this new example line by line and give you a good understanding of this current implementation.
1. Let’s start with the class import section of our class.
|
[cc lang=”javascript” width=”550″] package { import flash.display.Bitmap; import flash.display.BitmapData; import flash.display.Sprite; import flash.events.Event; import flash.geom.Point; import flash.geom.Rectangle; /** [/cc] |
In the above code we are importing the Bitmap class as a display object for our BitmapData blit canvas. The demo will be contained in a Sprite instance that will have the Bitmap added to its display list. We will be running an EnterFrame event that will use the generic Event class in its listener function. This EnterFrame Event will be used to simulate the frame by frame tile-based animation of our game character. The Point and Rectangle classes are needed for our blitting operations.
2. Now we will take a look at the variable definition section for our class. This will include the embed compiler directive for our tile sheet.
|
[cc lang=”javascript” width=”550″] public class TileSheetEmbed extends Sprite{ [Embed(source = ‘skyKingGraphics.png’)] private var TileSheet:Class; private var backGroundBitmapData:BitmapData = private var canvasBitmapData:BitmapData = private var canvasBitmap:Bitmap = new Bitmap(canvasBitmapData); [/cc] |
(We had to break a couple lines for space reasons, so make sure you re-attach them. I have added extra blank lines around them for emphasis)
Notice that our class extends Sprite. It can extend MovieClip, but there is no need since we only have a single dynamically created frame for this example. We actually take care of a lot of business in this code section, so let’s take a closer brief look at each of the variables.
First we embed the “skyKingGraphics.png” file as a class named TileSheet. Bitmap files are embedded into the swf as instances of the BitmapAsset class (a sub class of Bitmap) and not as BitmapData instances as in the Flash Library.
Next we create the backGroundBitmapData instance that will act as both the black background for our demo and as the “eraser” between blit operations. The canvasBitmapData will be the actual viewable blit canvas. It will be added to the display list inside the canvasBitmap instance. Remember, BitmapData instances cannot be attached directly to Sprite or MovieClip instances (as in AS2).
Our animation has three frames that will play in order repeatedly. We are copied them each into the array three times each (in a row) to create a rudimentary delay between tiles. This helps to slow down the animation and not let it run too fast. There are other more elegant methods to do the same procedure (such as creating a delay variable), but this gets the job done just fine for the demo. The tileList Array instance holds the tile numbers from the tile sheet that we want to play in order. Notice there that this is where we have three of each tile id number. This will allow us to easily change the tiles to display, and the order in which they display, etc. We would just need to change the tile id numbers in this array. The tileCounter represents the index on this array to display. Our current tile sheet has 20 tiles available. The top left tile is tile id 0 and the bottom right is tile 19. The tile numbers go from left to right and then down and back to the left again. So, the right most tile on the first row would be tile id 9 while the left most tile on row 2 would be tile 10 and so on. The only three tiles that have characters in them right now are tiles 0, 1, and 2.
The tileSheet variable is an instance of the TileSheet class that we embedded.
For the blitting operations we have set up a reusable set of Point instances at the class level. We do this so we don;t waste memory and processor time re-instantiating these two Point instances on each frame for the two blitting operations. The backBlitPoint (0,0) represents the top left x, y coordinates that out backGroundBitmapData will start copying to the canvasBitmapData. The tileBlitPoint (20,20) represents the top left corner of the where our 32×32 character will start copying to the canvasBitmapData.
The blitRect32 represents a 32×32 Rectangle on the tileSheet where we will find the pixels we want to copy to our canvas (starting at the tileBlitPoint). The x and y coordinates of this Rectangle will be changed on each frame we want to display a new tile from the tileSheet.. Note that the y coordinate will not change in this example because all three of our tiles are on the first row.
The tileWidth and tileHeight are both 32. These much match the actual tile width and height on our tile sheet. The tilesPerRow variable is used in our blitRect32 calculation to determine what row we will need to blit from our tile sheet. In this example we will always be on the first row, but our code can support any number of rows of tiles.
3. Next we will take a look at our constructor function:
|
[cc lang=”javascript” width=”550″] public function TileSheetEmbed() { addChild(canvasBitmap); addEventListener(Event.ENTER_FRAME, runDemo, false, 0, true); } [/cc] |
The constructor function is very simple. We add the canvasBitmap to the display list and then set up our animation loop with a ENTER_FRAME event.
4. The runDemo function
|
[cc lang=”javascript” width=”550″] private function runDemo(e:Event):void { canvasBitmapData.lock(); canvasBitmapData.copyPixels(backGroundBitmapData, blitRect32.x=int(tileList[tileCounter]% tilesPerRow)*tileWidth; canvasBitmapData.copyPixels(tileSheet.bitmapData, canvasBitmapData.unlock(); [/cc] |
(We had to break a couple lines for space reasons, so make sure you re-attach them. I have added extra blank lines around them for emphasis)
The runDemo function starts by locking our canvasBitmapData instance. This keeps the canvasBitmap instance from drawing the canvasBitmapData to the output screen until the unlock method is called. We first blit the entire 100×100 black backGroundBitmapData to the canvasBitmapData using the backBlitPoint (0,0) as the location to start the copyPixels operation.
Next we calculate the top left-hand position on the tileSheet to start our copy of the game character. This is done using the current tile id number (0, 1 or 2) in the tileList array. The blitRect32 will represent the 32×32 rectangle that encompasses the picture on the tile sheet that we want to copy to the canvasBitmapData. It is modified each frame based on the tile id # in the tileList Array that we want to display. We use the tileCounter variable as the array index.
We now have the information to cut a 32×32 piece of our tileSheet and copy it to the canavsBitmapData. This is done with the copyPixels operation. We pass in the tileSheet as the source of the image data, as well as the blitRect32 that represents the rectangle of pixels to copy, and we also pass in the tileBlitPoint (which is 20,20) as the location to place the copied pixels on our canavsBitmapData. We unlock the canvasBitmapData and this allows the canvasBitmap instance to refresh itself with the new canvasBitmapData.
The final operation is to update the tileCounter so we will show so the next animation tile in the tileList array will display on the next frame tick.
That’s all there is to it.
Here is a version running. It’s not too pretty, but it gets the job done. He kind of looks like is a directing traffic on acid, but I’ll work on improving it before I finish the game.

Leave a comment