By Jeff D. Fulton
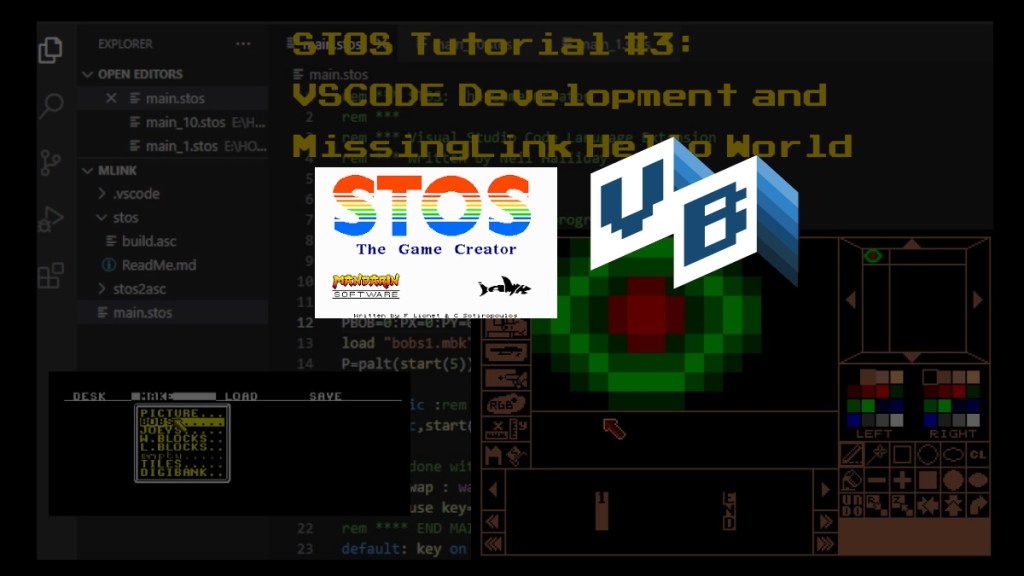
In this, STOS Tutorial #3, we will expand on what we did in Tutorials #1 and #2 by exploring a different rending method: Using the Missinglink extension to render “pre-rolled” sprites, and set up a simple compile. We are going to utilize the STOSCODERS.COM Visual Studio Code extension to create a work flow that will make editing in STOS much easier than it has ever been.
This is what we will be covering:
The written tutorial that follows is an expanded version of the video tutorial. If you only do one, this is the one do do. They both compliment each other nicely though.
- Creating a work pipeline with the Stoscoders.com VS Studio Plugin for your modern desktop
- Creating STOS sprites from a Degas File
- Creating MissingLink BOB Sprites from a STOS MBK file
- Rendering MissingLink BOB Sprites
- Compiling with STOS
Video Tutorial Version
There is one thing I want to get out of the way first. Its an explanation of why exactly we are using these tools to create games. It’s readily apparent that optimized Assembly language will create the absolute best Atari ST and STE games. This is the way that I want to make games in the future, BUT I want to be able to make the best possible games I can, NOW. For this reason, we are exploring all that STOS offers and exploring what it takes to push it to its limits. WHY? Because I want A LOT of new ST games. I see games for every other platform being readily created, and with the exception of a few very nice new games and some OUTSTANDING demos and STE re-writes, there is little in the way of a pipeline for Atari ST and STE games. I would like to solve that problem by using all of the current STOS tools to makes games that are just as good or better than those that were created when the ST was viable commercial platform. Can we do it? Why not? The STOS platform can be used to make MUCH more than the 3 included games and can be extended to do a lot more then intended. Let’s explore and see if we can’t get some nice new games, or arcade conversions into a games pipeline for the ST. Even if you have never used an ST or STE before, we will be exploring game development on this 16 bit set of computers in a way that will give you skills that you can use on any retro or even newer platforms.
The first task I have always tried to accomplish with any new platform is to figure out what is the best way or combination of ways to rendering the sprites needed. So let’s do that. There turns out to be quite a number of ways to do this given the flexibility of STOS, the STE hardware and the number of extensions available that help to expand its capabilities.
At the end of the day, we’ll be compiling to 68000 Machine Language to test everything out using the brilliant STOS compiler.
If you have not taken a look at Tutorial #1 and Tutorial #2, you might want to do it before you start this one. They explain how to set up a development environment just like I have it. It is not 100% necessary though, if you have more experience with STOS and want to use your own setup, just realize that you will need the Blitter and Missing Link extensions from the STOS Time Tunnel Site, at the very least, to follow along. You will also need the STOS 2.08 version for download on that site.
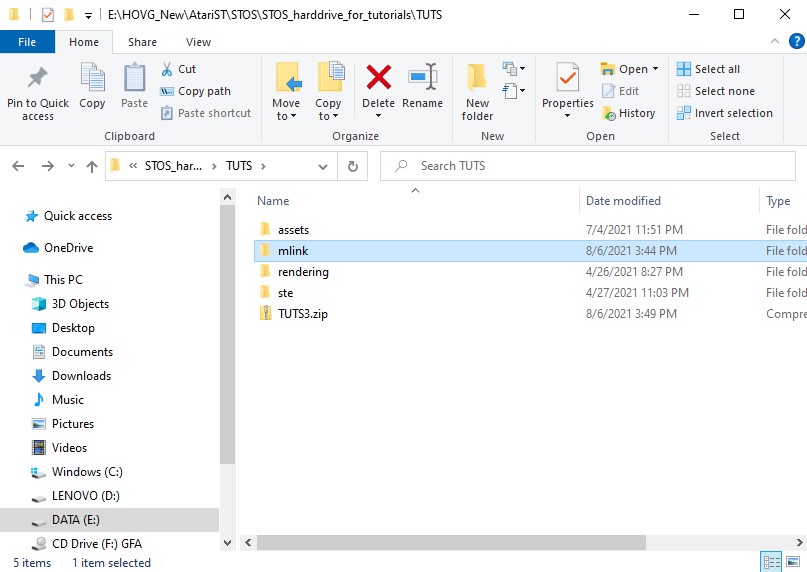
Here is the TUTS folder updated for this Tutorial. It replaces the one in the full STOS dev environment zip from Tutorials 1 and 2. It contains Blitter1.bas through Blitter7.bas from the first 2 tutorials and also the the tuts/rendering/rendertest1 collection of folders and files that I used to create this and the upcoming rendering tutorials. Feel free to look ahead, but in this one we will be using the “tuts/mlink” folder. We will be re-creating it in the tutorial, but I have provided the completed version in the download. We will be using VSS code to create a the mlink project and a new pipeline for importing and compiling code in STOS. The tuts/assets folder is also one to note as we will be using the assets in the folder.
If you follow along though, we will be creating ALL of the code files and all of the MBK files in the tutorial, the only asset we won’t create is the original sprite sheet I made in Degas – Well, were not actually going to edit in Degas directly, but you can if you want to create a 16×16 image of your own for use in this tutorial. I have already taken (with permission) Ari Feldman’s 32 color SpriteLib GPL sprites and have re-colored one of them for the ST’s palette and put it into a file called sprites.pi1. (we’ll get to that soon)
If you need Hatari setup and and STOS hard drive setup, please see Tutorial #1
STOS VSCODE PIPELINE
Here is the link to the STOSCODERS.COM site’s updated Visual Studio code Plugin, and hello world. Do those steps first. Remeber if you don’t want to do this, you don’t have to. All of the VSS code will become .asc files that open and run directly in STOS. I find the VSCode development pipeline to be by far the best way to code in STOS.
Visual Studio code is an amazing code editor that will work, on Mac, Linux and Windows. It’s the Perfect Compliment to Hatari and STOS for trying out hands as making some 16bit games for the Atari ST and STE platform.
If you don’t have Visual Studio Code, you can install it for your platform here.
You will also want to want to go to STOSCODERS.COM and follow the instructions on downloading the STOS Plugin and doing the hello world example. Once you have done that, come back here and we’ll create a new project for our Missinglink hello world and further explorations.
If you have downloaded the tuts folder, the “mlink” folder and a VSCode project will already have been created for you. Its a good idea to follow along, or create your own so you get a little practice in doing so.
Let’s make our first project in VSCode
After opening up VScode, you will want to make sure know where your Hatari GemDos hard drive is with STOS on it. This is where we are going to store the projects and build and deploy directly to this folder. I have a folder called TUTS/mlink, and wer’e going to open to that folder.
We going to note the location of this folder on my hard drive for when we need to create the working folder for our mlink project.
I’m doing this in Windows 10, so follow along as best you can in your own operating system.
Take note of the location of the TUTS folder and it’s full path, because when we create a new STOS project we are going to want it to create the project in this folder, which will mean we will have to either Type out the entire name, or copy and paste the Location (my preferred method). Hopefully in the next revision of the plug-in it will create the projects in the current open folder in VSCode.
Luckily, in Windows, I can simply copy the address as text by right-clicking on the address bar in the file dialog before I select to open the folder.
It will put this text into the clipboard: E:\HOVG_New\AtariST\STOS\STOS_harddrive_for_tutorials\TUTS
Note int he image below I have already created an Mlink folder, but you don’t have to create one, we’ll create one in VSCode as part of the project creation, or you can use the already provided folder in the .zip download.
In VSCode with the with the StosCoders.com STOS Plug-in installed, press
{CTRL] [SHIPT] [P] or [COMMAND] {SHIFT] [P] to open the command Palette
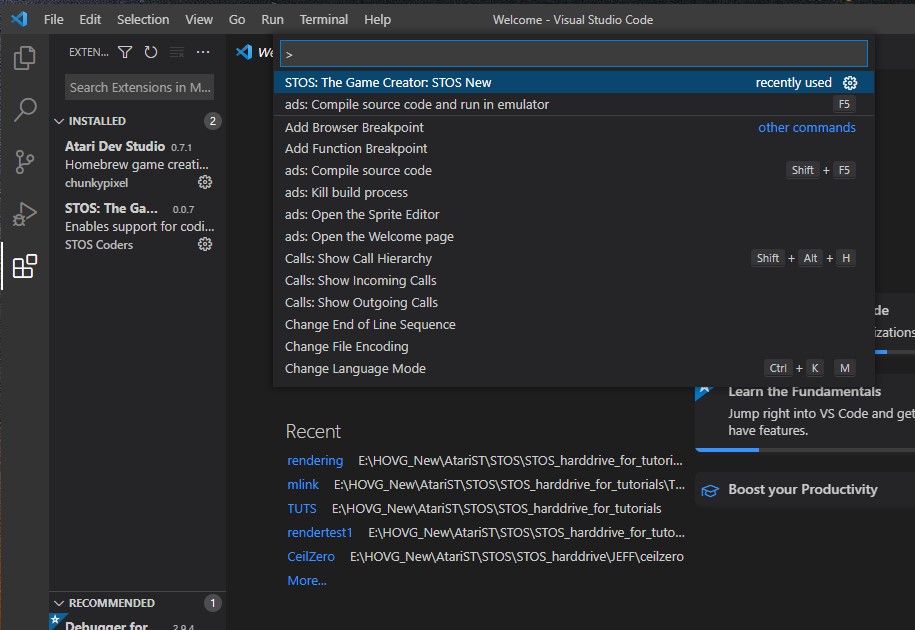
Type STOS NEW
It will ask you for the location, passt in the location of the tuts folder on your GemDosHardDrive attached to the emulator:
E:\HOVG_New\AtariST\STOS\STOS_harddrive_for_tutorials\TUTS
Next it will ask you for the project name:
Type mlink and hit [Enter]
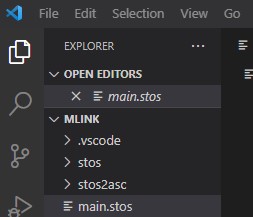
If you create the project on your own it will look like the one above. You can simply open the project folder provided in the download, in VSCode, and you will have all of the files for the project already completed. That’s not fun though, right?
If you watch the video version right now we would be building the empty main.stos in the new project and importing it into STOS to show an empty screen. Let’s skip that part and get tot he real work.
On to Degas!
Well, were not actually moving to Degas directly, but you can if you want to create a 16×16 image of your own for use in this tutorial. I have already taken (with permission) Ari Feldman’s 32 color SpriteLib GPL sprites and have re-colored one of them for the ST’s palette and put it into a file called sprites.pi1
Note: I have added the Degas Elite program to the new Tutorials zip for convenience in case you want to play with it.
We will be placing all of our STOS assets in the stos solder. This is where our .bas and .tos files will be built out of the main.stos file we will start to edit in a bit. First, we need a sprite to use for our tests. We will begin with an image that is in a Degas formatted file. This will allow us to use it straight out for blitting operations as we did in Tutorial #2, but in this tutorial we will concentrate on making BOBSprites using the MissingLink extension. We will import it into the STOS and use it to make a traditional STOS Sprite and a horizontally pre-rolled Missing Link Sprite.
The file is in the TUTS/assets/ folder. You will want to copy this to the mlink/stos folder we just created in the previous step. (note, the .zip file will already have a TUTS/mlink folder with the completed files in it).
Here is a screen shot of that file in Degas:
These two sprites are actually in the top left corner of the file and are 16×10 and 16×11 respectively. 16 is the minimum width of STOS sprite. This is done for various reasons, but mostly because Atari ST graphics memory is organized in words of 16 bits in a horizontal row. This organization actually works very well for standard GEM development, but is a headache for TOS game development. Tutorial #2 covered this in more detail, but suffice it to say, our goal if to get around that memory organization as much as possible to make speedy optimized ST games.
Let’s make a standard STOS Sprite
Missing link sprites are made from STOS MBK file sprites. We can use the Degas picture with the two frames of animation to create our standard STOS sprites and then the Missing Link pre-roll Make utility to create more optimized versions.
First we need to run the STOS sprite utility. If you have downloaded the latest version of the tutorial files, you can easily follow along. if you have not done so, you can still follow along, but some of the references and file locations might be different.
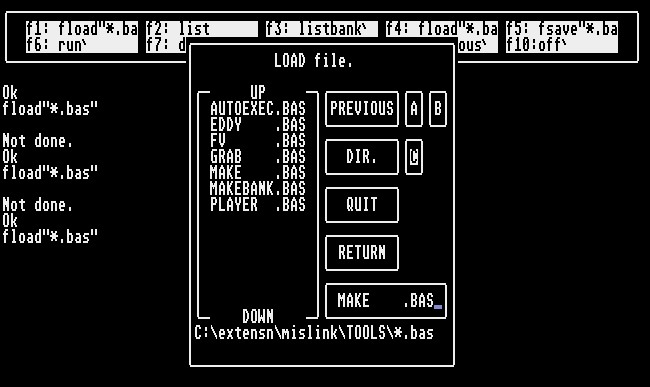
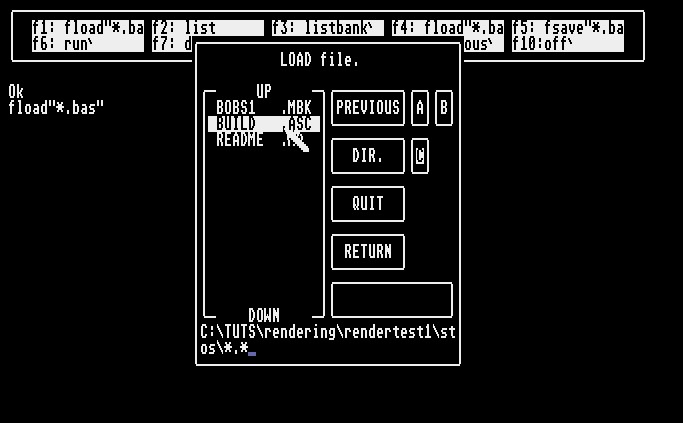
From the STOS editor, you need to load in the sprite.acb file. This is a file you can run directly from the STOS basic interpreter, because it is, in fact, built in STOS.
A hint about “fload”, you need to change the file spec to “*.*” in the ACB folder to find the accessories. It actually can be “*.acb” or “*.*”

Click on sprite.acb and hit enter to load it into the STOS editor.
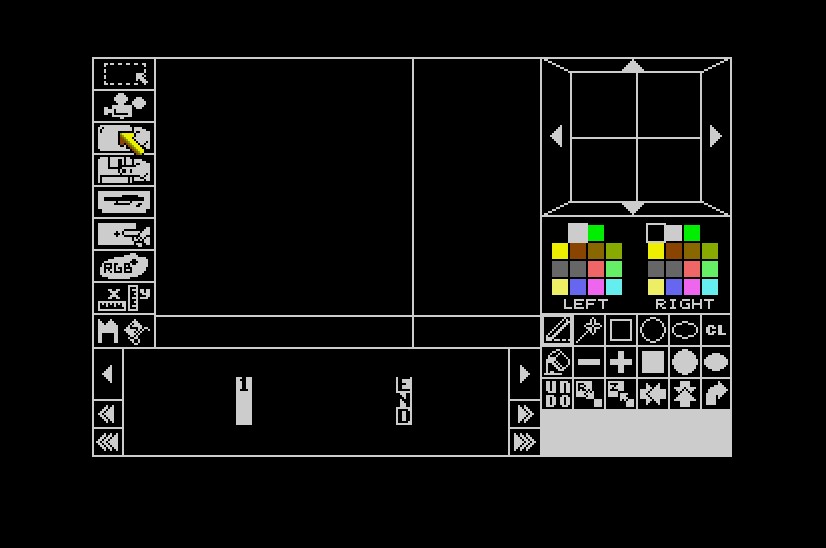
Type run and the STOS Sprite Editor should load.
There is complete documentation on the STOS Sprite editor in the documentation. If you need a refresher on STOS or have never used it before, you should probably download the manual from AtariMania.com or Archive,org and the Game Makers Manual (AtariMania.com). We will be going through the steps needed to convert our Degas picture into to Sprites, but we won’t be exploring all of the functions of the sprite utility.
Import the Degas file we created
We do this by using the Grab from pictures utility.
As a reminder, we should have a sprites1.pi1 file in the tuts/assets folder. There will be a file already there if you downloaded the files for this tutorial, if you have not, you will need to make sure you have followed the instructions for creating the project in VScode and and place the file in that location from the earlier steps.
How to load in the sprites.PI1 file
To load the a Degas file in,
- Select the Palette Icon, this will ensure that the loaded image’s palette will be used for all sprites
- Click on the Degas button in the left panel of the grabber utility
- The file dialog will pop up, you ill have to find the tuts/assets folder and then selected the sprites1.pi1 file
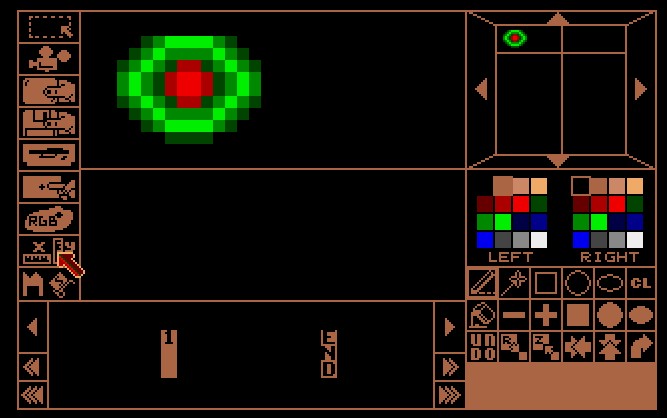
Once the file is selected and you hit enter this screen will pop up
Now we will turn these into the first two sprites in out STOS Sprites file
To grab a spite just drag box around it and click the left mouse button
When you click, the sprite will automatically be place into the sprite library designer
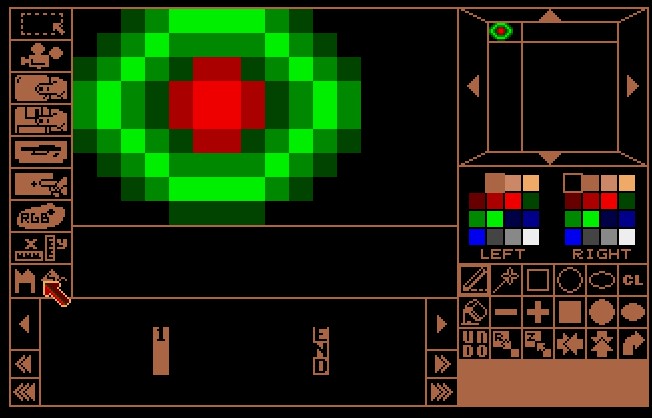
Before we add this sprite to the library, we want to move it to the upper left-hand corner of the sprite design window.
First we need to get to the utility that will allow us to do this. It will be a series of clicks.
1. Click on the palette in the upper left:
Next you will see the main Sprite design window. Position mouse over the X/Y ruler icon in the left left as shown in the next Picture and click.
Note: In the video tutorial I add a top line to this and sprite #1 to make them symmetrical. Take a look at that for further info.
This utility is called the size changer. Once you click on it, you will see a screen that let’s you do some modifications to the sprite’s size properties. All we care about doing is forcing the sprite into the upper left-hand corner.
Squeezing the sprite
By pushing the sprite into the upper left corner of it’s space we are “squeezing: the sprite” to use the STOS naming conventions for the Sprite Utility.
Click the button and seen in the next image and the result will be shown in the following image:
And the result:
You will see a cool little animation and the sprite will be squeezed into the upper left corner, making it useful for Missinglink and general coding.
Making the sprite dimensions as small as possible
The next thing we want to so it clear out as much right-hand space from the site (the minimum is 16px) and and much lower space from the sprite. The minimum is 8. We do this by manipulating the sprite size grid in the upper right.
Right now it should look something like this:
You can manipulate the lines to the right and under the tiny version of the sprite in this grid to get to the smallest size possible:
Place the newly created spite into the library
Click back to the main sprite window by clicking on the palette icon on the center of the left-hand column.
This will bring you back to the main sprite design screen:
The next Thing we need to do is place the sprite into the library.
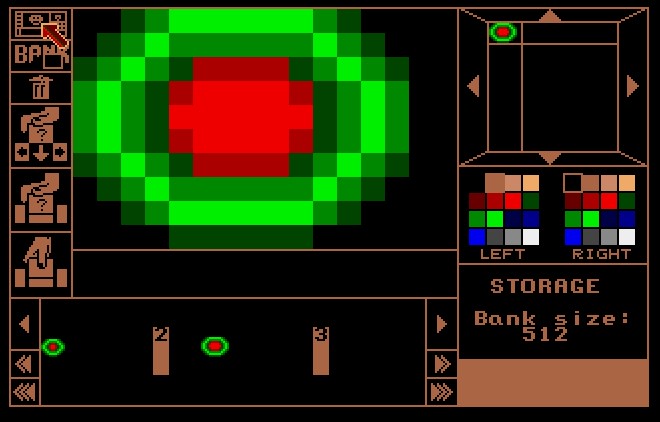
The first thing we do is click on the Library Store Button to show the library manipulation options window.
Once clicked, you will see Sprite Bank storage options:
By clicking in the “Put sprite” button, we add the a sprite to the the current slot. Note, this will overwrite a sprite already in that slot (see documentation for full examples). We don’t have a sprite in slot one, so our sprite is put nicely into the existing slot.
Repeat for the second sprite
I have already one all this work for you if you have downloaded the code files, so I will just show here what the library will look like if you follow all of the above directions and add the second sprite (it will be a slightly larger size.
Note” In the Video Tutorial we show exiting both sprites
The final Sprite Library
Note: Because we have two sprites that are different sizes, but they will animate to show a single pulsating ball, using the upper left-corner is not necessarily to best place to put the sprites.. We’ll see this later, but for now, this idea will work with multi-frame frame sprites. This will look a little off center when animated, but if you move sprite 1 right and down a couple pixels when rendering or in the designer, it will look fine. We’re just noting this here and will not worry about these details in a basic tutorial.
Saving the sprites.mbk
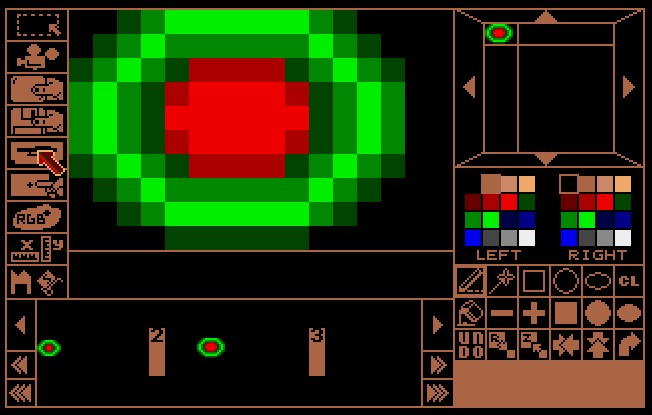
Step 1 – click the main screen icon in the top left of the sprite bank store screen
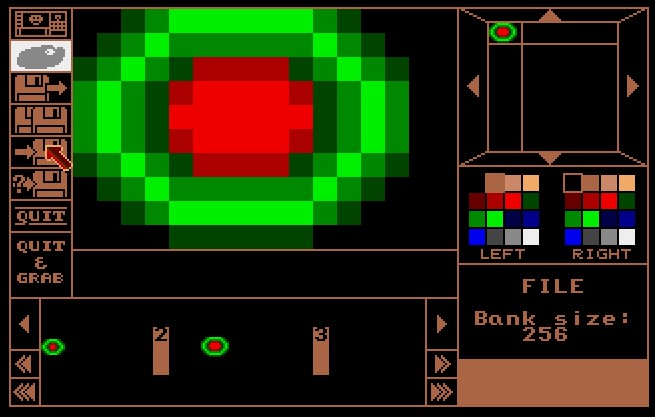
Save Step 2 – click the file icon
Save Step 3 Click the save icon
Save Step 4 – find the assets folder and save sprites1.mbk
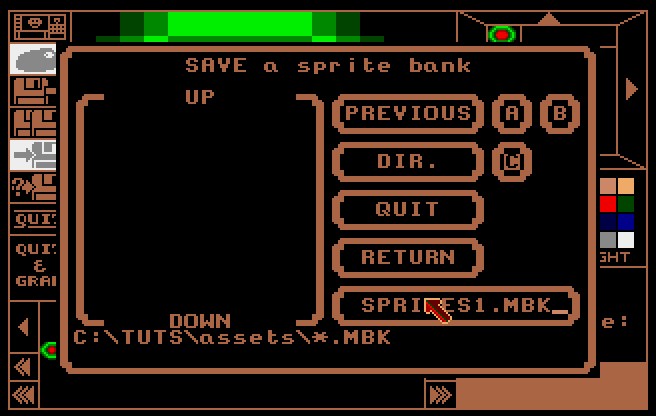
Once save, you can quit and move to the next step on creating missing link re-rolled sprites from this MBK file
I always save a backup file too. Its far to eary to write over you MBK files
So repeat the last step and save also it as SPRBK1.mnk
Creating Missing Link Sprites
Still working in our emulated (or real) Atari ST, we need to to exit (Quit) the Sprite accessory if you have not already. We are going load in the missing link utility for making the more optimized, but also more memory intensive “BOB” Sprites. Since My target for games on the ST and STE is a 4MB emulated STE, I’m not going to be TOO concerned as we are trying to make the best games we and given the full resources of the machines available to us now.
Load the Missing Link Make program
Missinglink has a utility that will create a new BOB MBK file out of our spritesMBK and let us position them easily at horizontal positions other than 0,15,30 (multiples of 16 stating at 0 relative). Because the ST stores data for the low res screen in 16×200 vertical bands, moving and positioning objects at arbitrary horizontal positions takes a lot of memory management, STOS does this for us in interrupts with it’s 15 sprites, but it takes A LOT of processor time. With Missinglink Sprites, that processor time is virtually eliminated.
You will find the the MissingLink make tool in the extensn/mislink/tools folder with the name make.bas
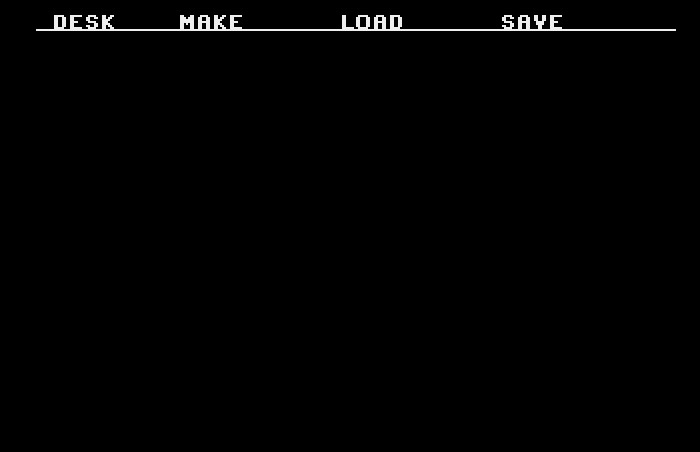
You will be back at the STOS main editor screen: Type “run” and the make screen will sppear:
Load sprites1.mbk
Make Bobs
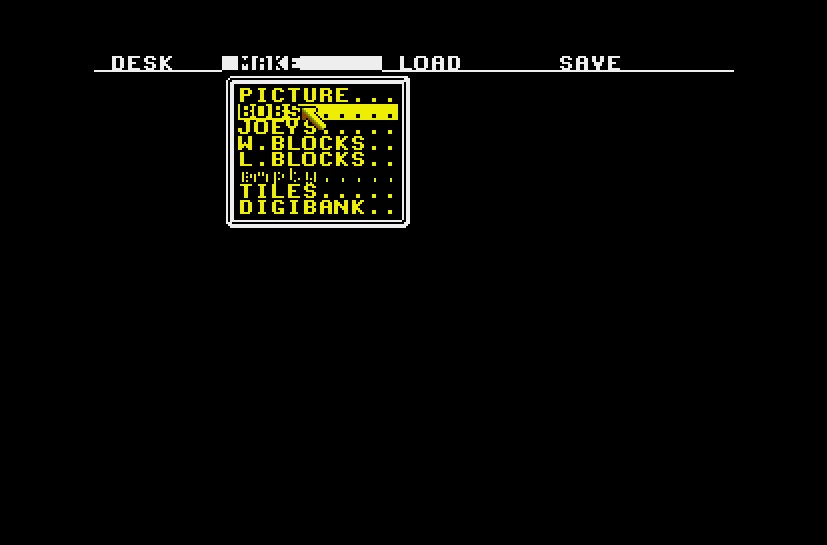
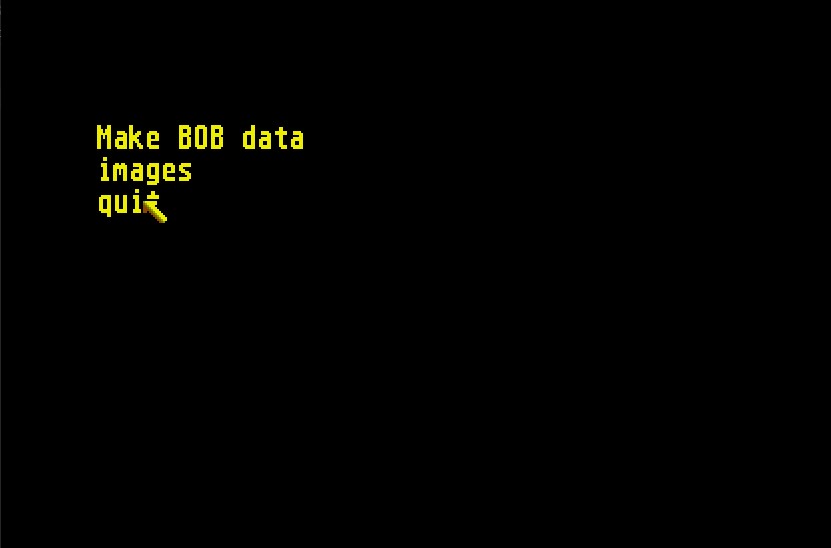
Make bob data
To use the default settings, 16 versions each sprite, offset one horizontal pixel at at time. simply click Make Bob Data. You will see it create the images.

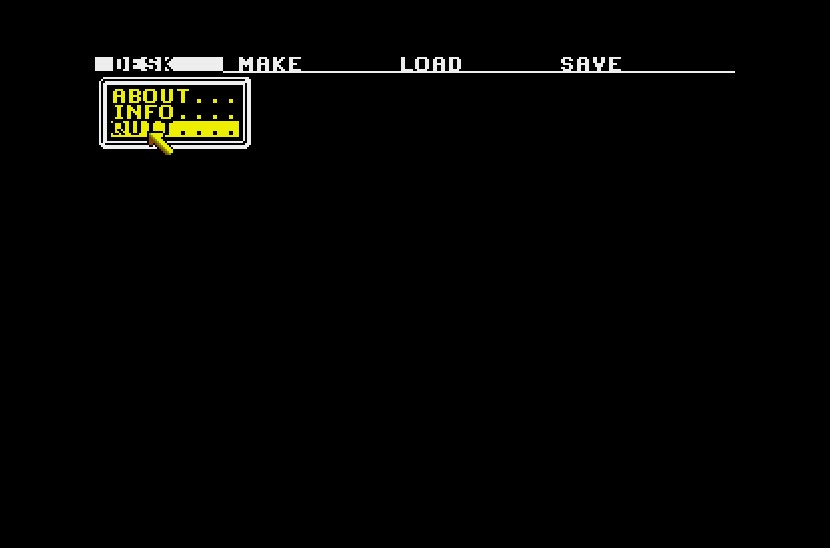
Quit the Make Bobs Utility
Save the bobs
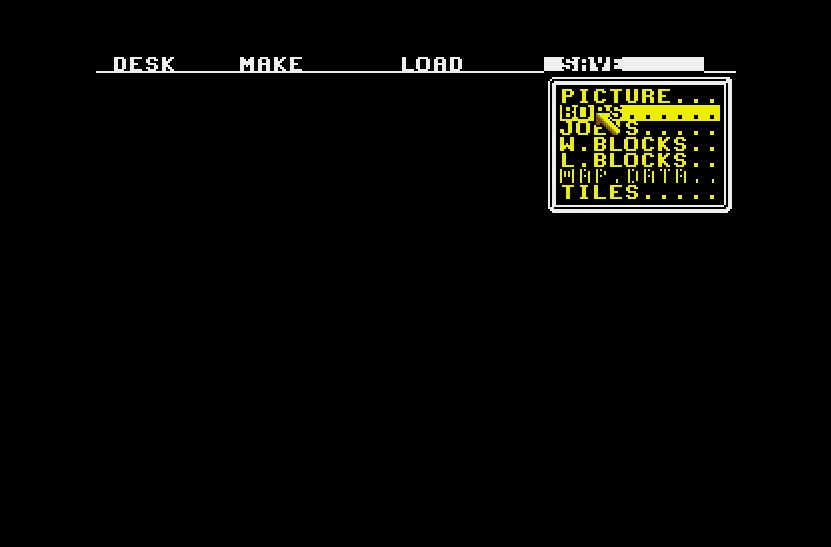

Quit the Make Utility
Now we are ready to do a little coding.
Ad Missing link sprite to the screen
Now we are going to go back to VScode again and start editing the main.stos file we created earlier. First, make sure you copy the bobs1.mbk file we just created into the VScode project inside the stos/ folder. If you downloaded the project files, this will be in the TUTS/mlink/stos folder. When we build our build.asc file using the VScode product, it will be placed into this folder, so we want to have our assets files for the project in this folder or a sub folder so STOS can reference them properly when running the code.
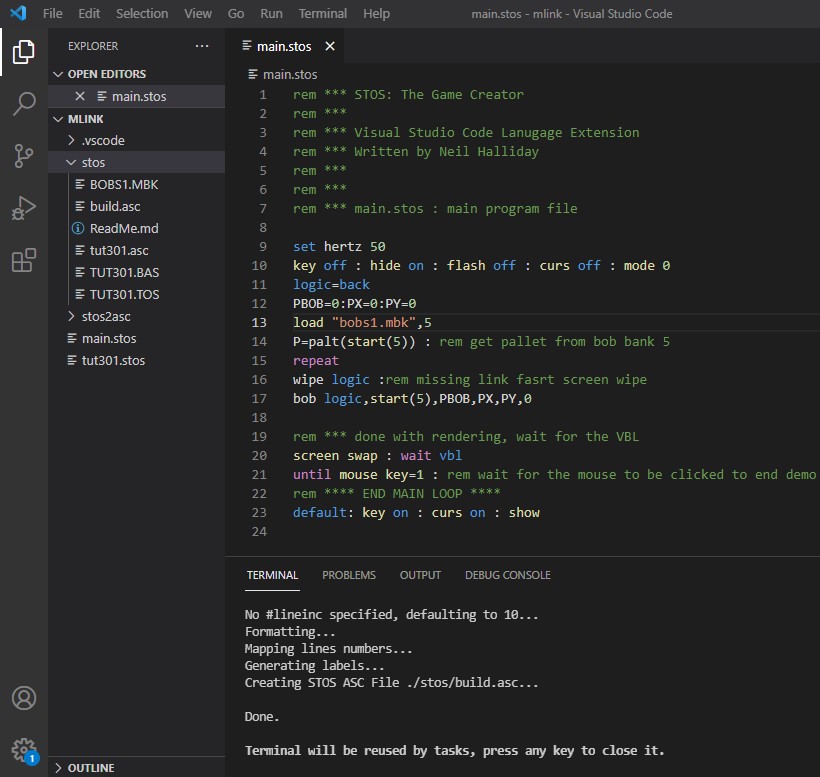
For the “hello world” demo, this will be the contents of the main.stos file. Notice that next to the main.stos name I will be giving you the name of the file in (). This is the name that you will find in the download and how we’ll rename the file at the end of the tutorial
main.stos (tut301.stos)
rem *** STOS: The Game Creator
rem ***
rem *** Visual Studio Code Lanugage Extension
rem *** Written by Neil Halliday
rem ***
rem ***
rem *** main.stos : main program file

set hertz 50
key off : hide on : flash off : curs off : mode 0
logic=back
PBOB=0:PX=0:PY=0
load "bobs1.mbk",5
P=palt(start(5)) : rem get pallet from bob bank 5
repeat
wipe logic :rem missing link fasrt screen wipe
bob logic,start(5),PBOB,PX,PY,0

rem *** done with rendering, wait for the VBL
screen swap : wait vbl
until mouse key=1 : rem wait for the mouse to be clicked to end demo
rem **** END MAIN LOOP ****
default: key on : curs on : show
There are a couple new things in this from our last two tutorials. First, we are loading in our bobs1.mbk file instead of an image to blit our sprites from. This file contains the two frames of our single sprite (the green and red blinking eye).
In our repeat … until construct, we are replacing out blit operation with a Missinglink sprite display: bob logic,start(5),PBOB,PX,PY,0
We are using the BOB command to pull PBOB, image 0 from the BOB file, and display it at PX,PY, both set to 0. The final 0 in the bob command is not used. Just keep it at 0.
Finally, because we are not yet using the high speed MissingLink joystick commands in this rendertest, so the mouse is not turned off. We can end the repeat … until with a wait for a mouse click.
Once the main.stos file is complete (always save it first), press CTRL-SHIFT-B or COMMAND-SHIFT-B to build the stos/buid.asc file. If there is an error, check to see if there is a syntax error or missing line in the code.
Note: As long as you are building to a GemDos hard drive folder that is attached to Hatari or STEEM you will be able to load the build.asc file directly into STOS. If not, you will need to move the contents of the mlink/stos folder to a folder on your GemDos hard drive. The best workflow will always be to have your VSCode project folder right in the GemDos hard drive folder so you don’t have to move file after reach build.
Next, boot up your emulator. If you followed the other two tutorials, you will have everything set to use Hatari, but obviously, STEEM is a good choice also.
Ensure you have both Missnglink extension files in the STOS and COMPILER folders in your STOS install, everything will work, even if you have not followed the previous tutorials.
Once STOS is loaded, make sure memory is clear (type the new command) because we are going to import the build.asc file. You need to do this each time you load in a new build or .asc file will be merged with whatever file is in memory.
Importing an ASCII file is done the same as loading a .bas file, except you need to change the STOS file dialog to “*.asc” to find the ASCII files to load.
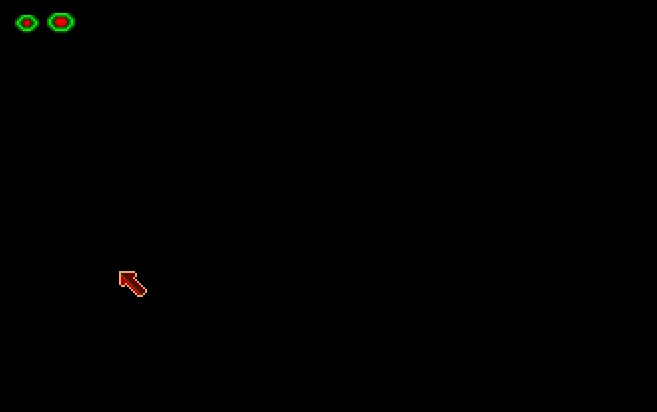
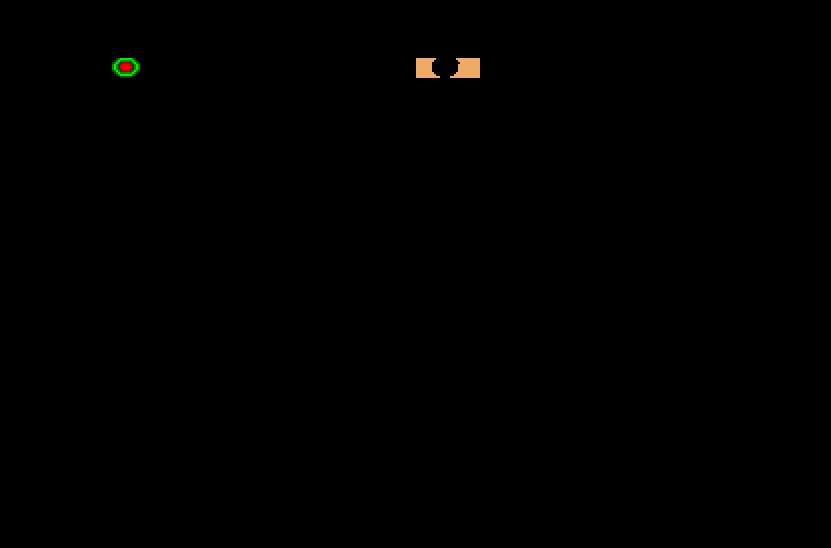
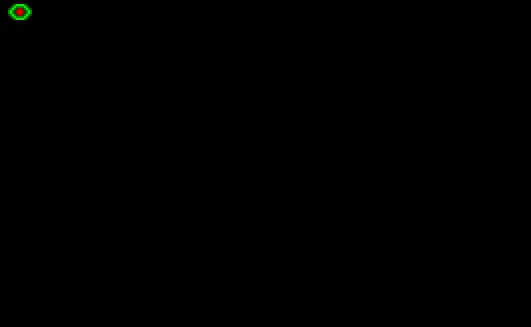
Once the file is loaded you will notice that when you import a .asc file it will slowly add each ASCII line to the screen and into memory). type run and you should see the first BOB sprite in the upper left corner.
For archival purposes, save this as tut301.bas in STOS. Also, save main.stos and as tut301.stos in the project and build.asc to tut301,asc
Load the compiler
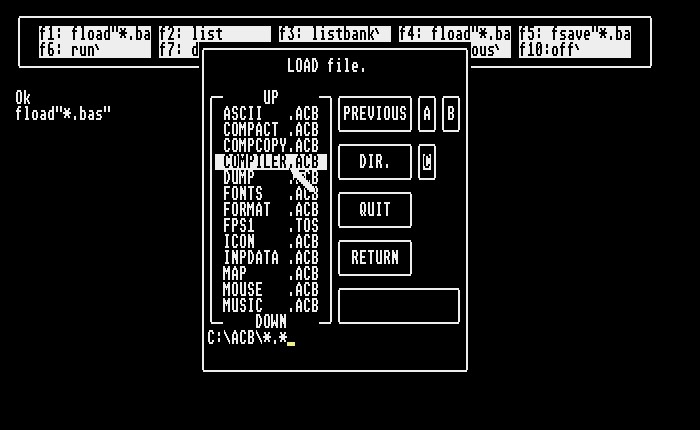
If you have downloaded the files for this tutorial, the compiler will be available in the ACB folder and the and the MissingLink compiler extension will be available in the compiler folder. The compiler is a standard ACB file that can be loaded into the interpreter and run (and listed) like any basic program.
Load it and then type run
Set up compiler
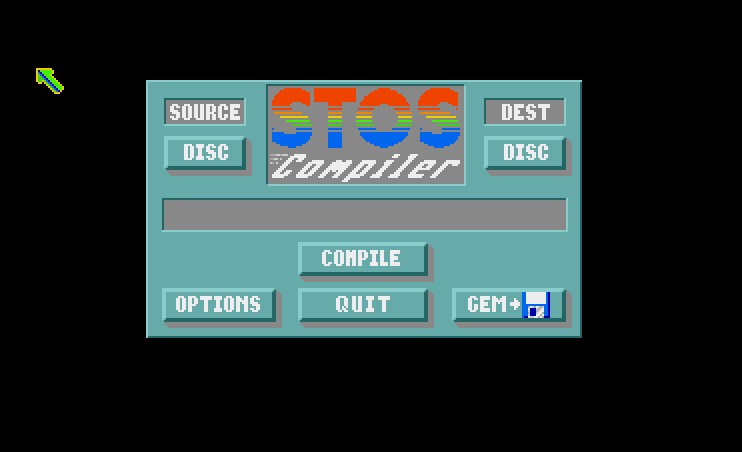
Once we have loaded the compiler and typed and started it with the run command, we need to set some simple options to compile our program.
When the compiler loads, we want to make sure we set some simple settings for our compile.
- We want to out Source is DISC
- We want to make sure our DEST is also DISC, not memory.
- We want to make sure our compile type is GEM –> Disc not Basic –> Disc
Compile
Press the [Compile] button and it will ask for a source file. Choose the tut301.bas file we just saved from the build.asc

Next it will ask for the destination file. Watch out because it might (mist likely will) default to the ACB folder rather than the source folder. Change this to the folder where the tut301.bas is located so we can find it easier when we run the program in GEM

Note: I have previously compiled this program, and if you downloaded the code for this tutorial, you will have an fps1.tos already in your folder. It’s ok to overwrite this.
Once you set the destination file name and location it will automatically compile and leave you wioth this screen
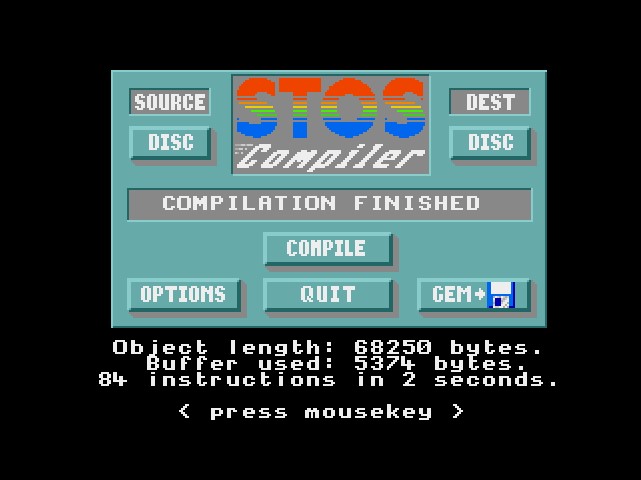
Load Gem
You can now reset the emulator (or actual ST if you are lucky enough to be using one with a hard drive) and boot into GEM
Find the c:\tuts]mlink\stos folder (this is the standard location for the downloaded tutorial files I have provided (in the 8.3 DOS/GemDOS naming format)..If you are using a different file location, the fps1 file will be there.
Run In Gem
Simply Double Click the file like any other program and it will run. It isn’t actually a GEM program, but it will run in TOS, started from GEM

This should be the output

Archiving your build files
Ok, so new we have a little pipeline for adding code to the to the main.stos, loading it into the emulator, running it, and then compiling it.. If you have downloaded all of the code, you will see that I have saved the build.asc and the main.stos out with the tuts301 prefixes for safe keeping. We will build on these in later tutorials.
What’s Next
II the next Tutorial we will start by creating a simple Frame Rate calculator to see exactly what the performance is of a STOS Sprite and a BoB Sprite, and then test with multiple sprites.
In further tutorials we will explore more rending possibilities and test combinations of blitter and Missing Link rendering.
If you are adventurous, I have place a lot on render tests into the renderrtest folder that you can load in an play with to get ready for next time.
Until next time…Into the Vertical Blank!
Find us here:
Youtube
Into the Vertical Blank: Generation Atari | Facebook
Into The Vertical Blank Pod Cast – Twitter

Leave a comment