
In this, the third in our New Make A Thing! Series on Atari ST STOS, we are going to experiment with 6 different methods to display and move a 27 sprite invader formation on the ST screen.
We will start with Basic ST sprites, move through various pre-shifting strategies and finally use the Missing Link Extension. We will also create a basic Frame Rate Counter to help compare the methods.
Github: https://github.com/intotheverticalblank/makeathing/tree/main/AtariST/STOS
Previous Tutorials
Part 1 – Sprites
https://atomic-temporary-177246833.wpcomstaging.com/2023/05/13/beginning-atari-st-stos-1-sprites-make-a-thing/
Part 2 The screen and Tiles https://intotheverticalblankcom.wordpress.com/2023/05/28/beginning-atari-st-stos-basic-2-the-screen-and-tiles/
STOS MissingLink Hello World Tutorialhttps://atomic-temporary-177246833.wpcomstaging.com/2021/09/14/stos-tutorial-3-vscode-plug-in-development-pipeline-and-missinglink-hello-world/
VIDEO
Intro
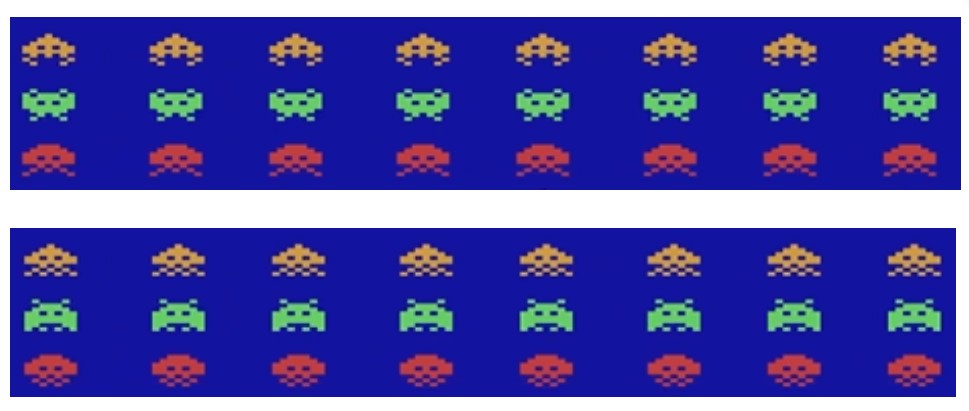
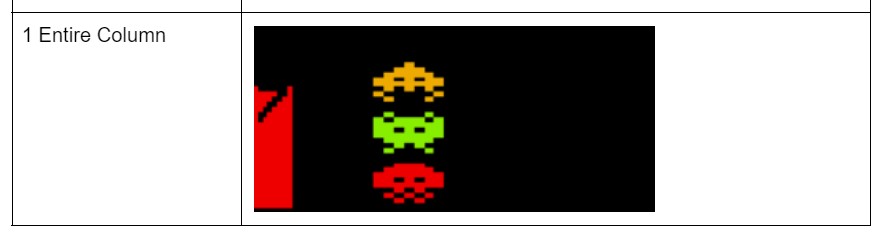
When you look at the Gorf Arcade game here, especially level 1, Invaders, you see a number of enemies in formation. In fact, there are 27 aliens lined up in three rows of 9 each. . STOS has a built in limit of 15 sprites. If we were to create a game similar to this, using one standard STOS Sprite for each invader, we’d use up our entire allotment of sprites before we even got to the end of row 3 and not have any left for the player or missiles.
There are multiple ways to achieve the effect of having a group of 27 sprites march across and down the screen in STOS. We’ll look at six of them in this session.
If we use just individual 16×8 images for the invaders instead of STOS Sprites, and screen copy them directly as is to the physical screen we will be limited to them moving in 16 pixel jumps left and right. This will not look very clean and certainly not like the arcade game This is the problem that STOS Sprites were designed to solve, but we don’t have enough to have each of the 27 16×10 invaders occupying their SPRITE object.
We could attempt to do something like using 9 sprites only for the invaders where each represents a column of three invaders. This could actually work as it would leave us with 6 more sprites for the rest of the game objects. The problem here is that with the player ship, missiles, GORF mothership sprite, etc we are nearing the 15 sprite and the rendering will be much slower than we want. We’ll try this tough and see how it works
We could try various types of “pre-rolling” and or pre-shifting the sprites and or formation for quicker throughput that is faster but uses memory.
We could also use one of the STOS extensions like MISTY or MissingLink to do pre-shifting
Today we are going to test many of these, look at the results and pick one to use for our game,
First off let’s take a quick peek at some resources I found that were invaluable in looking for details on the Gorf Arcade game/
Great Gorf Article https://www.retrogamedeconstructionzone.com/2020/07/gorf-unfixing-shooter.html
The retro game deconstruction zone that goes deep into all the levels and mechanics of Gorf and its 5 separate levels. As we proceed further into our game design we’ll use this to decide what features to keep and what features to change and or improve on for our game called Grief.
I also found that Champ games has a Gorf Arcade port for the 2600/ It has the cleanest version of the Arcade sprites I could find, so I borrowed them for this tutorial.
2600 Gorf Porthttps://www.youtube.com/watch?v=p1xKWFeNqAY
The first Level of the Gorf Arcade game plays a little bit like Space Invaders. Let’s take a quick look at it now. We will be trying to duplicate the game play of this level over the next few sessions.
The invader formation in level one is where we are going to concentrate the bulk of this tutorial session. Again, we have the 27 invaders and we want to move and animate them across the screen as a group.
I copied these from the Champ Games Gorf Arcade for the 2600 by hand using Neochrome on the ST. Neochrome is a very nice tool for hand drawing ST graphics because of the way it zooms in and separates pixels.
That was the easiest way to get clean single color graphics for the arcade sprites. Gorf, by Bally midway, used copies of the Space invaders sprites. They seemingly had the rights to do this because they distributed space invaders in the USA.
Here is a picture of OUR sprite sheet so far, save as a uncompressed Degas file called “GRSPR.PI1”
We will not be loading this directly into our game, but instead we are going to use the STOS Sprite utility and the Missing Link extension to create memory banks of sprites for us to use.
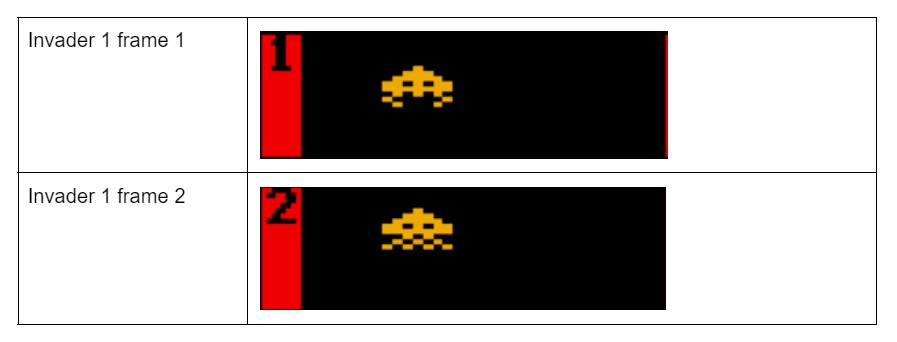
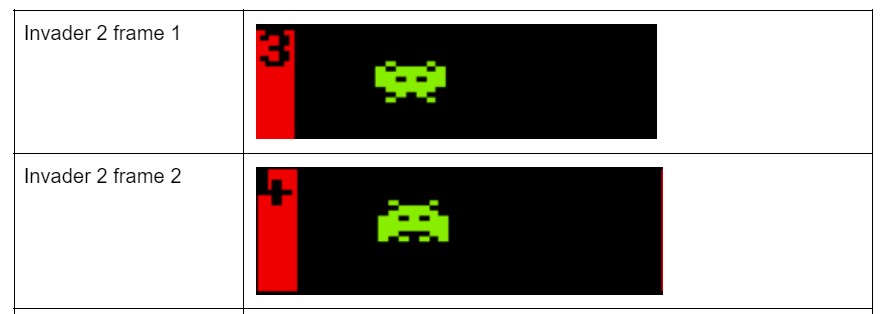
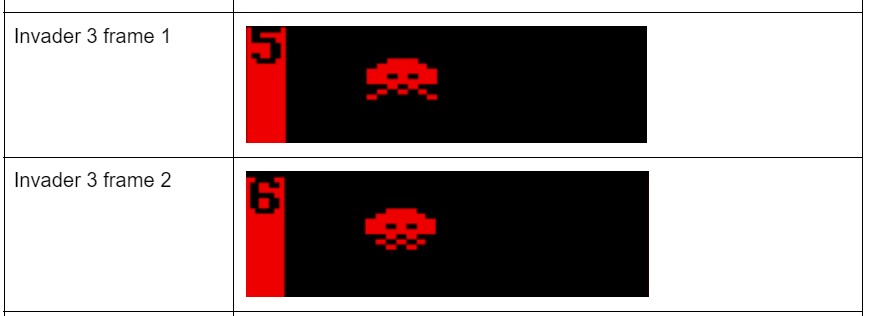
The final, number 7, sprite in this file is a pre-created column of invaders. Rest assured this will get some heavy use today.
Each of the invaders has 2 frames of animation. Our goal for this session will be to create a formation of invaders that move across game screen using with the best frame rate possible on a standard 8Mhz Atari ST
Remember a couple things before we start. First, there usually are more than one way to solve a game development problem and I am not saying that my way is the best. Also, we will use ANY part of standard STOS or an extension that we feel will give us the best game play.
These sprites are in a file called called: GRSPR.MBK
We have also created a MissinngLink Bob sile called: BOBSPR.MBKWe will explain how to use this file in our final test for today.
There is no actual need to follow along in VSCode to get something out of this tutorial. It will help a lot to be able to load in the files and take a look though as we will build off of them as we continue to make Grief
All of the code can now be found in out new Github project for Make a Thing:https://github.com/intotheverticalblank/makeathing
There is a new “Grief folder there”
Let’s show how to make a new VSCode project if you have the STOSCoders.com VSCode Plug-in installed.
Make a new project for Grief in VS Code
Command or Control + Shift + P to open the command palette.
Type STOS
And choose the STOS NEW Option
And put in the address of the where you want to create your project
I’m using E:\Documents\INVBSTOS\code
The Project Name I am using is Grief, but you can call it anything you like
I have also copied the griefspr.mbk into the Grief/STOS folder.
We are going to continue with the concepts we started in Basic STOS #1 and #2 last time, and also from the tutorial I did a couple years back using BOBs in Missing Link.
The first thing we are going to create is a simple frame rate counter so we compare the throughput of these various methods.
Frame Rate Counter
The goal of our frame rate counter is to measure how fast each of the 6 rendering methods works for our game.
We will need to make use of WAIT VBL, some counters, and a little basic math to enable us to accurately measure the frame rate.
Before we start a render loop to time we must do this:
- TIMER=0 – this command sets the internal STOS timer to 0. It increases by one every 50th of a second
- FCTR=0 – This is NOT a STOS command but a variable we have created to count the number of frames that have occurred total in the render session.
- FPS=0 – Also not a STOS command, this is a variable that will hold the current calculated frame rate of our test
- SE=0 – Another custom variable that will keep a count of the total number of seconds elapsed during our test
Inside the render loop
- We will either render the graphics manually here or in case of the first test, STOS Sprites will render with the built-in commands on their own interrupt and we will just use this for counting the frames left for code other than sprites
- INC FCTR –
This adds 1 to the current value of the frame counter variable - IF TIMER > 50 then INC SE:TIMER=0
The timer counts based on the frame rate, so we know when it hits 50 that one second has elapsed. We will increase the SE variable by 1 and then set the timer back to 0 to start over again. One seconds elapsed for every 50 timer ticks - if se>5 then fps=fctr/se: t$=str$(fps)+ “FPS” + chr$(0)
This is the biggie. Once we have 5 seconds elapsed (se=5) then we know there should be enough frames counted in FCTR to not get a divide by 0 error
We then calculate the current fps by dividing the number of frames counted (FCTR) by the number of seconds elapsed (SE). and print it on the screen.
We’ll see this in action in the 6 render tests that we will start NOW.
Render test 1 – Using 9 STOS sprites
Here is what we are going to do.We are going to put 9 sprites on the screen, each using the image 7 from the GRSPR.MBK file.This is the column of 3.
The size of 16px by 30px high for each
We will put them on the screen like this
for sctr=0 to 8
sprite sctr+1,sctr*16,0,7
Next
Here we are simply adding one of sprite 7 to the screen every 16 pixels starting at 0,0.
We will move the sprites with the move command
for sctr=1 to 9
  move x SCTR,"(1,1,132)(1,-1,132)L"
next

move on
This is not new, we did this with a single sprite in the first tutorial. This is just using the same graphic in 9 sprites to create a formation
Next we will have the FPS counter code. Since STOS sprites run in their own interrupt and not the vertical blank, we have to make sure we use wait VBL to accurately count the number of frames left in each second for game logic, other graphics etc. We do this in a REPEAT UNTIL loop that counts to 200 frames and then stops
fctr=0 : rem number of frames counted
timer=0
fps=0
se=0: rem seconds elapsed

REPEAT
inc FCTR: rem inc the frame counter
if timer >=50  then inc se:timer=0
if se>5 then fps=fctr/se: t$=str$(fps)+ "FPS" + chr$(0)
locate 30, 1:print t$

WAIT VBL
until fctr=200
Now lets run the pre-compiled rendtst1.tos to see the results
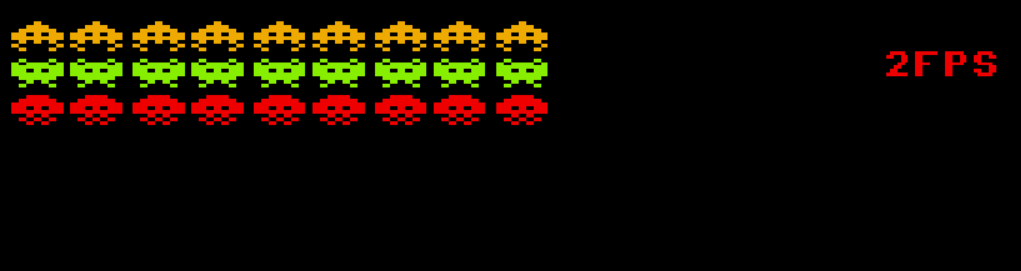
What you will see is the formation crawl very slowly across the screen and finally output 2FPS as the result.
This is not good. While this basic FPS counter is also not going to be 100% accurate, it’s a good enough estimate AND the eyeball test tells me this is not fast enough for our game.
Next, we will remove that move command and relieve the stress on our code of that interrupt for STOS Sprites.
Render test 2 – Using the Vertical Blank to Update STOS Sprites
In this test we are still going to use the 9 STOS sprites for our formation, but we are going to turn sprite automatic updates off and we will update them in the vertical blank along with our FPS timer.
Much of the code is the same as before but here are the key differences.
move off
update off
for sctr=0 to 8
  sprite sctr+1,sctr*16,0,7
Next
MOVE OFF stops any current sprites from moving. This is here just in case there were sprites used before this part of the game. There are none, but this is a clean way to stop them all from moving
UPDATE OFF will stop sprite updates from showing on the screen until you issue the manual UPDATE command. We will do this in our REPEAT UNTIL loop.
repeat
inc FCTR: rem inc the frame counter
if timer >=50  then inc se:timer=0
if se>5 then fps=fctr/se: t$=str$(fps)+ "FPS" + chr$(0)
locate 30, 1:print t$
update
wait VBL
The FPS counter has not changed, the only thing we have added is the UPDATE before the WAIT VBL.
Let’s take a look at rendtst2.tos to see how this performs.

This has helped a little bit. The sprites still crawl slowly across the screen, but we get 7 more frames a second, a little bit smoother render. There are still some skipped pixels and little jumps but it is altogether much faster.
We have a ways to go before we have enough speed for a real game though.
Render test 3 – Moving STOS Sprites Manually
In this test we will still use 9 STOS Sprites, but we will remove the MOVE command altogether and set a DX (delta or change in X) value to 1 pixel on each frame on the x axis
The code for this test is very similar to test 2, but we are removing the loop that sets up the MOVE commands and adding two new variables defined outside of our render loop
- dx=1
This is the change in x on each frame, basically a constant rate of speed of one pixel - sprx=0
This holds the x position of the leftmost sprite (Sprite 1). This is used to calculate the x positions for all 9 sprites on each frame and also is used to calculate when the formation needs to stop and move in the opposite direction.
Inside the render loop we have some changes.
for sctr=0 to 8
  sprite sctr+1,(sctr*16)+sprx,0,7
Next
This code is used to loop through all 9 sprites and update their respective x positions 16 pixels a part.
sprx=sprx+dx
if sprx >172 then dx=-1
if sprx=0 then dx=1
On each render frame we increase SPRX by the DX value and check to see if it is greater than 172 (meaning the rightmost Sprite 9 is right at the right edge, and if so we change the dx to -1 so the formation will march in the opposite direction. We also check if the SPRX = 0 and if so, we make sure to send the formation back to the opposite direction.
Let’s take a look at how this performs

Hmm, this looks about exactly the same as render test 2. It’s time to move away from STOS sprites to see if we can figure out a way to really amp up the FPS
Render test 4- Offset Pre-roll Scrolling
In this test we’ll use Screen Copy to create the illusion of the formation moving smoothly across the screen in 1 or 2 pixel increments.
This is the one I have been thinking about for a while now, but just in the last few weeks found the time to test. When I was playing with the blitter commands I discovered…well I have no idea if I discovered it or not,but I have not seen it anywhere else. I’m sure it’s a pretty standard way of doing things for the seasoned ST or Amiga programmer. I just have never come across it in my limited perusal of the topic.
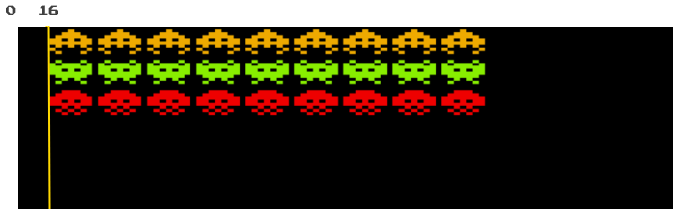
We are still going to use the 9 sprites, BUT only as a way to set up the initial formation, We will then copy that to a screen memory bank, screen 10, and place it at an offset of 16px. Screen 10 will look like this:
The invaders are drawn starting at 16x and 0y. Because Screen COPY allows the source of the copy to start at non 0 and non multiple of 16 increments we can use this offset as if we are scrolling the invaders across a set of 16px wide tiles. We have to do this because the DESTINATION of the Screen Copy MUST be 0 or a multiple of 16.I know it sounds a little obtuse now, but it will become clear
For example if we want to place this invaders image at position 157 on the physical screen, we would need three pieces of information.
- The x position we want to display the invaders on the physical screen. We have that. It’s 157. This is variable X1 in our code example
- The offset back from the first invader in the 16 px black area to the left of the invaders is stored variable called XOFF
- The total amount length to copy from.
The offset is pretty easy. Divide 157 by 16 and the remainder is the offset. We do this with the MOD math function. 16 goes into 157 9 times with a remainder of 13.
xoff=x1 MOD 16
xoff = 13
The screen copy looks like this:
screen copy 10,16-xoff,y1,xoff+160,y2 to logic,x1,0
- SCREEN COPY – Build in STOS Command
- 10 – the source screen or memory bank for the copy
- Y Location to start the copy = 0
- X location to start the copy, 16-xoff – or 3
- X2 location or the . from: Xoff+160 13+160 or 173.
- Y2 location. This is 30, The formation height is 30,
- TO – part of the STOS command to let STOS know the DEST location is coming up next
- LOGIC – The screen to place the copied pixels from 10 on.
- X Location for destination – X1 or 1547
- Y Location for the DEST copy = 0
The actual X location to start our copy from on screen 10 is 3, and this will allow it to look like the first pixel of the left column of aliens at pixel 157. This is an offset scroll and is very effective for quickly placing objects at any x position you need them to be on the ST’s physical screen.
After we do the screen copy we will want to update x1 by DX and then check to see if we are at the the far left or far right and turn the formation back in the other direction
The screen copy looks like this:
screen copy 10,3,0,173,30 to logic,157,0
x1=x1+dx
if x1=0 then dx=2
if x1=xend then dx=-2
Let’s take a look at this in action.
Wow, what a difference. This moves very smoothly and at close to 30 FPS. This could be a candidate for how we will do all of our moving game graphics.
Let’s try a couple more ideas to see if we can squeeze a little more power out of STOS on a plain old ST.
Render test 5 – Create our own pre-shift image array
Render test five takes a new tack and starts us down the path of storing what are called “pre-shifted” versions of our sprite in memory and then blasting them to the screen when needed.
If this sounds familiar, it’s because many ST programmers talked about using this tactic to make a playable and fast 16 bit games for the ST back in the 80’s and 90’s, AND Extensions for STOS such as MIssingLink perfected it for making games in Basic.
We are going to test Missing Link Next, but first, to get an idea of what is involved, and to see if we can do this ourselves, we will test our own pre-shifted sprite.
We are going to take ONE column of 3 invaders and store versions of if at each of 16 possible positions in the first 16 pixels of the screen. To display the formation, we will need to use a MOD command very similar to what was used with the previous render test 4’s pre-rolled scrolling formation.
Like Render Test 4, we have some setup to do before we can display our sprites on the screen and time them with the FPS counter.
We need to create a pre-shifted array of Screen Strings using the Screen$ to create and store these images in an array.
for x=0 to 15
  cls
  sprite 1,x,0,7
  put sprite 1 :wait VBL:sprite off
  fm$(x)=screen$(logic,0,0 to 32,32)
  locate 1,14: print "  "
  locate 1,15: print "x ";x
next x
- The FM$(16) will hold all 16 pre-shifted images of the sprite. T
- Inside this loop we will draw a sprite to the screen: sprite 1,x,0,7
- We will then replace that spite with a “rubber stamp” of the sprite on physic with the PUT SPRITE command.
- We’ll wait until the vertical blank,and turn the sprite off, but the “rubber stamp” PUTversion will remain on the screen.
- fm$(x)=screen$(logic,0,0 to 32,32) – This copies the current 32×32 chunk of the screen to the array at the current array index X using the SCREEN$ command.
- We then repeat this operation for all 16 positions
To display the formation we need to show 9 copies of it on the screen much like render tests 1, 2 and 3, but using just SCREEN$ graphics and not STOS sprites
for ctr=0 to 8
x=(ctr*16)+x1
xoff=x MOD 16 : rem which array value to show
screen$(logic,x,0)=fm$(xoff)
next ctr
- We set up our CTR loop to start at 0 and move through all of the array elements in FM$
- The X value To start drawing any of the 9 sprites is X1 + CTR*16
- The offset, or the actual pre-shifted spite to display at that position is calculated pretty much the same as with offset formation in render test 4
xoff=x MOD 16 - We then place the image from the array at the correct X and Y position and move to the next column: screen$(logic,x,0)=fm$(xoff)
I predict that this will be much faster than using 9 sprites, but not quite as fast as using a single offset pre-roll scroll as in render test 4. This is because we have to do 9 separate smaller draw operations, one for each of 9 columns as opposed to the single draw operation with the pre-rolled formation
9 x 32 x 32= or 9,216 pixels to blast to the screen on each frame for this version as opposed to 176×32 or 5,600 that needed for the max width in render test 4.
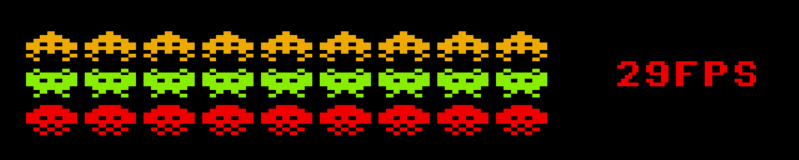
Let’s take a look:

28 FPS! Not bad at all. The extra memory used to store the pre-sifted array almost completely made up for the almost double amount of pixels that need to be displayed on the screen.
I do think I could do one further test in plain old STOS, which would be to pre-shift the entire formation and not just a single column and put those in an array. That would use up A LOT more memory but only mean shifting 5,600 max pixels from the array on each frame. Instead of doing that though, let’s take the next big step. WE have proven that plain old STOS is fast enough to make a pretty fast version of what we want to show, BUT I want it even faster, and that means using the MISSING LINK extension.
Render Test 6: Missing Link
I have a previous video and Tutorial that shows the basics of MISSING LINK. I’ll link that below and in the blog post that goes with this tutorial.
I don’t want to spend a lot of time repeating that, so please take a look for more information if needed
I created a set of BOB sprites using the Missing Link MAKE utility. You will find the BOBSPR.MBK in the gitHUB and also the full set of Missing Link documentation, demos, utilities and tools.
In future tutorials, while we finish this game, we will explore Missing Link in copious detail. For now I’ll summarize what it is doing and how we will achieve as much speed as possible in STOS using this incredible extension.
Much like Render test 5, we will be using 9 columns of pre-shifted data to display the invader formation.
SETUP
- Dim XBOB(9),YBOB(9),SBOB(9),IBOB(9), DXBOB(9), DYBOB(9), ABOB(9)
We need to set up a series of Arrays to hold data for the “bobs” we are going to use in place of sprites on the screen. Missing Like loves ARRAYS of organized data.
Because there are no complex data structures in STOS and multi-dimensional arrays are VERY SLOW, we are using a concept called parallel arrays to hold all of our data.
Don’t let the name confuse it, it’s just a bunch of lists of data all organized by the same array index for each BOB we want to display and manipulate.
- XBOB(9) – The X position of each BOB
- YBOB(9) – The Y position of each BOB
- SBOB(9) – The Status of each bob. 1 to display it, 0 to not display it
- IBOB(9) – The image in the BOBSPR.MBK to display
- DXBOB(9) – The change in X position on each frame – This is my variable, not a missing link value
- DYBOB(9) – The change in Y position on each frame – This is y variable, not a missing link value
- ABOB(9) – Whether or not to animate the BOB. – This is my variable, not a missing link value
- The following code loops through all of the arrays and sets initial values for all of the BOBS
Here we create memory pointers to the arrays. Missing Link makes heavy use of C style coding that interfaces directly with Machine Language to greatly speed up operations
VIMAGE=varptr(IBOB(0)) - VXBOB=varptr(XBOB(0))VYBOB=varptr(YBOB(0))VDXBOB=varptr(DXBOB(0))VSTATUS=varptr(SBOB(0))
On Each Frame
repeat
wipe logic
many bob logic,s5,VIMAGE,VXBOB,VYBOB,VSTATUS,0,0,9,0

many add VXBOB,VDXBOB,9,0,319

if XBOB(0)=0 then dx=2: for ctr=0 to 8:DXBOB(ctr)=dx:next
if XBOB(0)=xend then dx=-2:for ctr=0 to 8:DXBOB(ctr)=dx:next
- The Missinglink WIPE command is a very fast replacement for the STOS CLS command
- Many BOB blasts the 9 “BOB” sprites to make the formation to the screen.
- Many ADD is a super fast replacement for a loop through an array. I use it here to add the the DX value to the X position on every frame
Now, how does it perform?

50+ FPS?
Now, that’s FAST. It’s just an estimate in an emulator, but it shows that using this method, the ST and STOS are barely breaking a sweat with this 27 sprite formation.
AND, this is why we will be incorporating Missing Link as much as we can going forward to make our game as we continue with Grief.
Next time
In the next session we will add the player, missiles and collision detection.
Credits
Recorded, Mixed, Edited and Produced by Steve And Jeff Fulton
Music :Eyes Like the Sun – Tony Longworth : support Tony’s Patreon music https://www.patreon.com/tonylongworth
Theme by Brian TravisTitle: Into The Vertical Blank theme Words & music by Brian Travis (c)(p)2021 Taste This Moment Music ASCAP http://www.briantravisband.com/
Branding by Daryl Litts
Contact
https://intotheverticalblankcom.wordpress.com
https://www.buymeacoffee.com/intotheverticalblank
FB: https://www.facebook.com/intotheverticalblank
Twitter: https://twitter.com/Atari_VB_Pod
Youtube: https://www.youtube.com/@intotheverticalblank
Jeff on Threads @jeffdfulton
Jeff on Twitter @8bitrocket
Steve on Threads @steveafulton
Steve on Twitter @fultonbot
https://cdnjs.buymeacoffee.com/1.0.0/button.prod.min.js
Leave a comment