
Note: This tutorial series is designed as video series. The text below is provided as a way to make it easier to follow, but I recommend you watch the video and use the text as supplemental.
This is the first in a series of videos showing my own techniques using Atari 7800 Basic. I do not claim these are the best or only way to do things, but they are the methods I have developed over the past few years.
The code in these tutorials is designed to be simple to read, so most of it will be unoptimized. Feel free to download the code from Github and optimize it yourself if that bothers you. You will find the GitHub link in the end notes.
Step 1: Visual Studio code
The Atari 7800.
For me, it’s Atari’s most underutilized console, and the one that holds the most promise as to what can be done with a 6502 based Atari machine. The 7800 is backwards compatible with the 2600, but sports the Maria chip designed, at the time, to move graphics around the screen like no other machine, but especially better than the Colecovision, Atari’s main competition in 1983 when design started.
We will talk more about the history of Atari and the 7800 as this series continues, but for now, let’s get started by jumping in and created Atari 7800 Hello World”
—
The first step is to download Visual Studio Code:
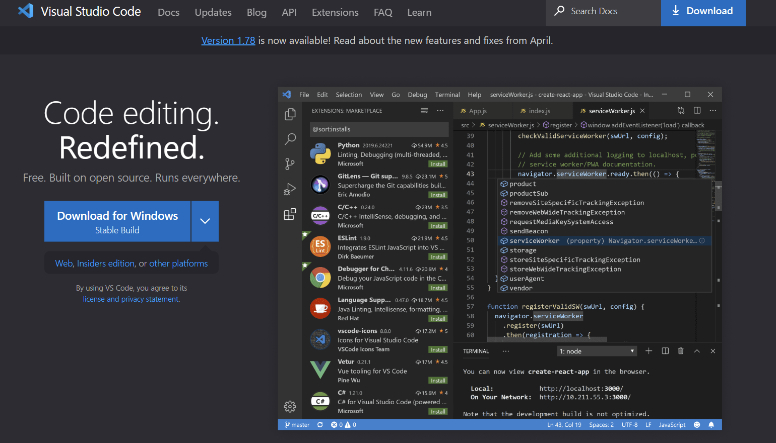
You can find it for the PC or Mac or Linux at code.visualstudio.com:
Visual Studio Code: Visual Studio Code – Code Editing. Redefined
Once you have downloaded that you click the plug-in extensions button on the left side of the IDE, and you will see a searchable list of all the extensions available.
There are many.
Search for “Atari Dev Studio”
Atrari Dev studio combines Atari 7800 Basic (created by Fred Quimby with help from Bruce Tomlin) and now maintained by Mike “RevEng” Saarna.
With the plug-in you can easily compile bAtari basic code, Atari 7800 Basic code, and DASM code. It also features a spirit editor and the A7800 emulator for easy testing.
Look over on the preview pane and see the information for Atari Dev Studio
Notice it was created by ChunkyPixel We are all indebted to ChunkyPixel for creating such a fine price of software.
Now click the install button.
Next create a new file and save it on your hard drive.
I will call mine demo1.78b
The .78b extension will make sure Visual Studio Code associates the file with the 7800 compiler and provides code hints included in the Atari Dev Studio plug-in.
Now we are ready to go!
Step 2: Boilerplate
First we will drop in some boiler-plate code of which we will need in all of Atari 7800 Basic games.
I’m not going to explain every detail of every option we are using, but just enough so you can dive-in later and explore all the incredible options available in Atari 7800 Basic. You can find detailed descriptions of all Atari 7800 Basic functions in The Atari 7800 Basic Guide (https://www.randomterrain.com/7800basic.html)’
 set zoneheight 16

 displaymode 160A

 set plotvalueonscreen on

 set romsize 32k
Note: All code (except for jump labels and couple other things we’ll discuss later) must be tabbed-in at least one space)
The first line, “set zoneheight = 16” is how we set the horizontal band zones for sprites. Each horizontal band can have a set number of sprites, usually 16-20 depending on how many CPU cycles it takes to draw the entire screen. You can set this to either 8 or 16. 8 allows for more bands, but with fewer sprites in each band, while 16 has less band, but more sprites in each band. You will need to experiment with these options, and many others to optimize your Atari 7800 game.
The next line sets the graphics mode: displaymode 160A
160A is the most basic mode. It is 160 x 192 pixels, which means the pixels are like tall rectangles. Each sprite in this mode can be 3 colors plus transparent.
There are other modes too: 160B allows for 12 color sprites, while multiple 320 modes allow for various hi-res screens that rely on color artifacting for multi-colored sprite display.
If you watched our previous video on 7800 Sprites, you can see some of these modes in action.
There will be a link in the notes. (https://www.youtube.com/watch?v=oUuy5c5_8kA&t=1s)
My favorite in 160A mixed with some 160B sprites, as we will see later in these lessons.
The next line, set plotvaluesonscreen on is used for debugging and we will talk about it later.
set romsize 32k, this is the size of the cartridge. 32K is small, but we don’t need anything else yet. There are many cartridge sizes including ones that contain extra RAM to hold data and expand the number of sprites that can be displayed.

The Atari 7800 Basic guide created by Mike “RevEng” Saarna and adopted by Duane Alan Hahn, a.k.a. Random Terrain will give you detailed information about the valid options for this command, as well as invaluable information about Atari 7800 Basic.
I usually keep it open in a window while I’m working.
This guide is updated often. There are many more commands and options listed in 2023 than there were in 2019 when I first started with it. In fact, just now I discovered something new.
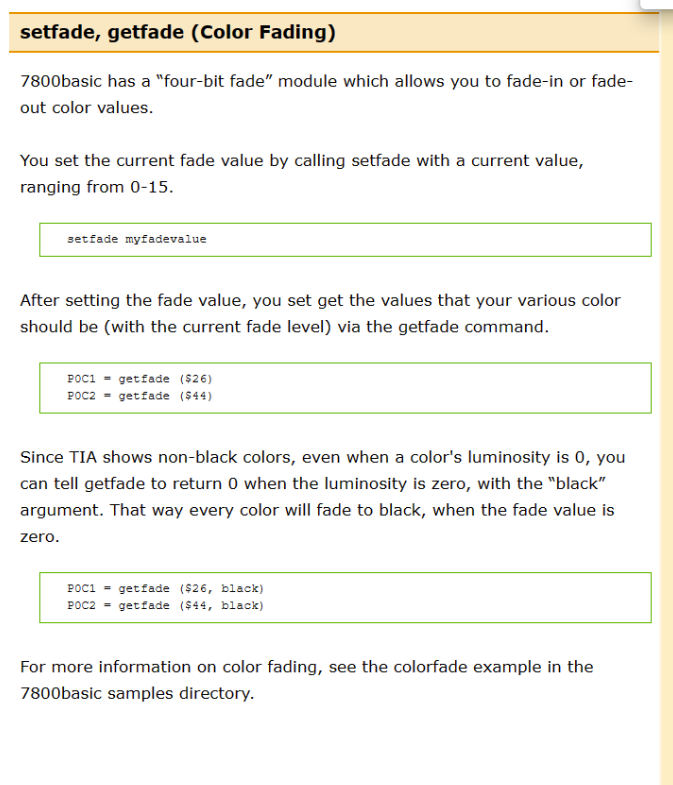
For instance, while writing this I discovered these palette fading commands I’ve never seen before. These would have saved me a lot of work on my last project.
There is absolutely no way I can cover all of Atari 7800 Basic in these tutorials.
My job as I see it, is to show you these demos and get you started. Once you are comfortable you can devour the Atari 7800 Basic Guide, and then even tackle Assembly language some day (if that’s your thing).
Anyway, for this game we will keep it simple for now and just use 32K.
With 32K we will not need to bank-switch, as the 7800 can address all 32K ROM space at once.
Don’t know about bank-switching?
It’s a way to almost infinitely expand the ROM addressable on cartridge.
I hope these lessons are successful enough that I’m inspired to tackle it later down the road.
The last line BACKGRND = $60 sets the background color.
BACKGRND=$60Press the little “rocket” button on the bottom menu to compile and run the code we just wrote.

You must have your cursor in the code window for it work work properly.
The output window will show the compilation steps.
When it is done, the A7800 emulator will automatically launch.
When we compile and run this program, it will go off into space with this mustard-colored background. This is a warning that something has gone wrong.
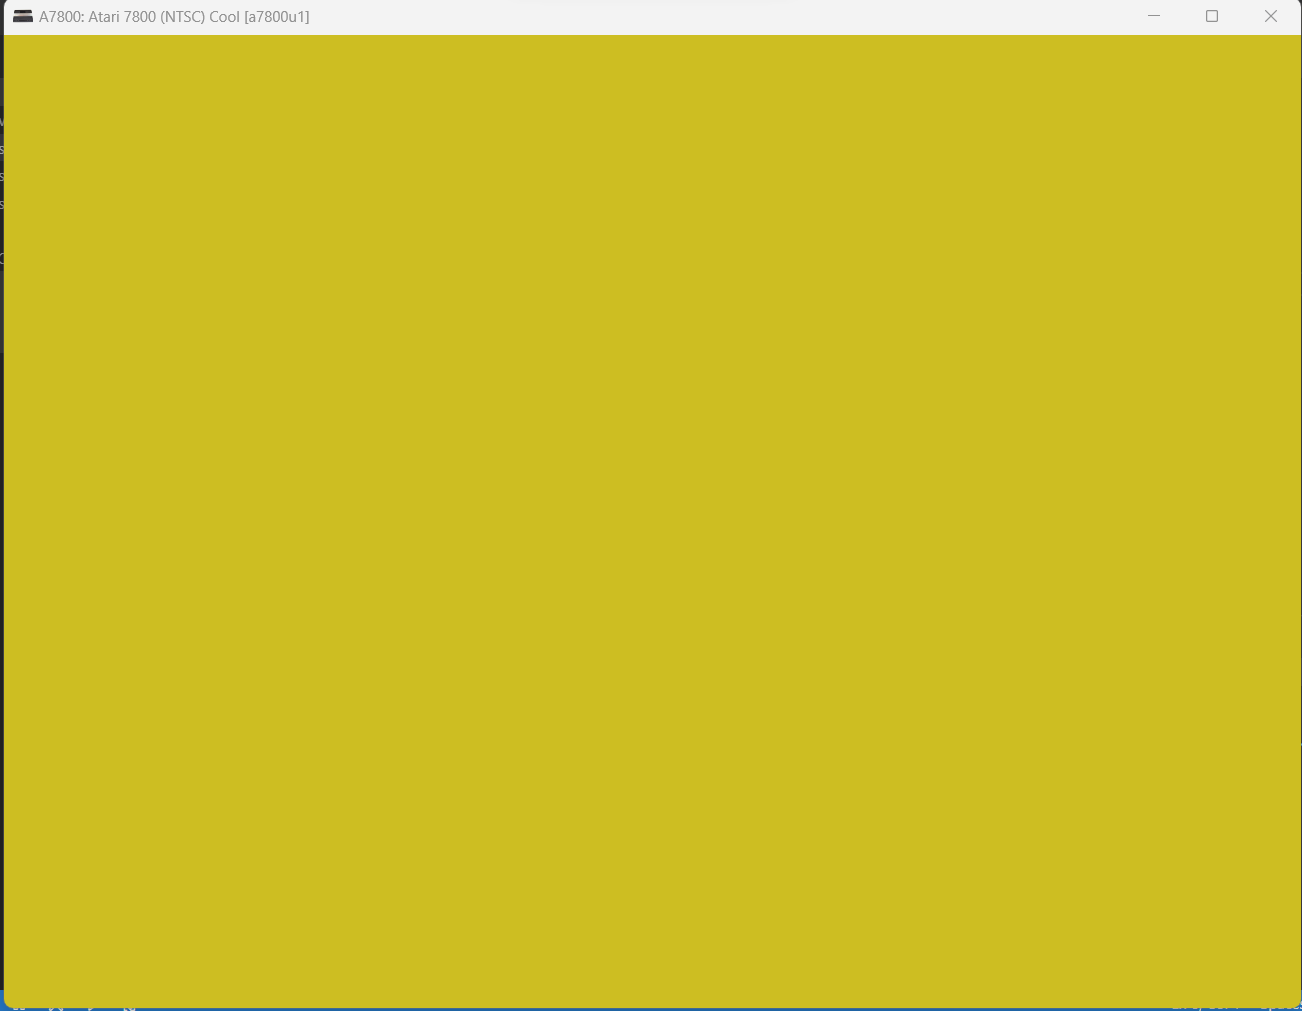
What has gone wrong is that we have not displayed anything yet.
Hit the Escape key [ESC] to close the A7800 emulator.
If you don’t close it, your next compile might not automatically launch the emulator.
To fix this we will add a simple game loop with the _gameLoop label with a goto plus a clearscreen and drawscreen lines, and recompile.
_gameLoop

 clearscreen

 drawscreen

 goto _gameLoop
clearscreen removes everything from the current display, then drawscreen draws the sprites in the displaylist.
Right now we have no sprites, just a background color.
And yes, that is a GOTO.
Get used to it.
To recreate complex logic in Atari 7800 Basic, you almost can’t avoid using GOTO.
Sorry.
You can create functions, but they also take-up precious resources, so I mostly avoid them
Otherwise you have goto, gosub, for:next and if:then for ALL your branching and logic.
Will these limits might break your long-held religious beliefs about programming?
Probably.
Will you also get used-to-it and find yourself thinking about how to solve complex problems with just a few control structures:
Also: probably.
_gameLoop is a label, which means it can be jumped to or be the start of a subroutine called by a gosub. Our “gameloop” is simply a never-ending loop that is called 60 times a second to refresh the screen. This is done with the last line, goto _gameLoop. All labels start in the first column, most other code must be tabbed in at least 1 space.
When we run it, this happens:

Our background color is displayed
Here is the final code:
set zoneheight 16

 displaymode 160A

 set plotvalueonscreen on

 set romsize 32k

 BACKGRND=$60

_gameLoop

 clearscreen

 drawscreen

 goto _gameLoop
Step 3: Game Loop
Next we will play with this background color settings to create a good old Atari color cycle.
The Atari 7800 has a 256 color palette and we will use ½ of them.
You can see the full color palette used in Atari 7800 Basic by opening the Sprite Editor or on The Atari 7800 Basic Guide.

We are going to write a quick program to cycle through 1/2 of the colors.
First we create a couple variables.
dim bgColor - var1

dim wait = var2
Atari 7800 Basic has a set of 126 built-in spaces for variables.
They are named a-z and var1 – var99
You can also set variables to memory locations in RAM, but we don’t need to do that yet.
We will create a bgColor variable to hold the color of the background as var1
We will create wait, which we will use to wait 10 frames before we change the color.
Since the NTSC Atari 7800 runs at 60hz, or 60 frames a second, that means we will change the color 6 times a second.
Then we will initialize those variables.
 bgColor = 0

 wait = 0
Next, inside the game loop we will increment the wait variable, and when it makes it to 10, we will set it back to 0, and increment bgColor.
Then we test bgColor and reset it when it gets to 127.
Why? no reason we could never reset it and just let the byte that represents bgColor increment past 255 and it would have become 0, but most of the time we will be setting limits so this is good practice.
_gameLoop

 clearscreen

 wait = wait + 1

 if wait > 10 then wait = 0 : bgColor = bgColor + 1

 if bgColor > 127 then bgColor = 0

 BACKGRND = bgColor

 drawscreen

 goto _gameLoop
Notice in the code above I used a “:” on the if statement line. The “:” lets you have multiple lines of of code statements on the same line.
Now if we compile and run the program you will see the background color changes 6 times a second.
Here is the full code for this step:
 set zoneheight 16
 displaymode 160A
 set plotvalueonscreen on
 set romsize 32k

 BACKGRND=$00

 dim bgColor  = var1
 dim wait = var2

 bgColor = 0
 wait = 0

_gameLoop
 clearscreen

 drawscreen

 goto _gameLoop
—
Step 4: Hello World
One final touch for this first demo.
It can’t be “hello world” unless it says “Hello World”.
However, the Atari 7800 does not have any kind of native text capabilities.
So instead, we must load in a graphic that represents our text.
Atari 7800 Basic provides functionality to turn that graphic into a character set that can be plotted like text on the screen
There is a font graphic provided in the sample programs that come with Atari 7800 Basic.

To get it, you need to download the Atari 7800 Basic package (see a link the notes: https://github.com/7800-devtools/7800basic/releases), or download the code for this lesson from GitHub (also in the notes) Each character in 160A mode is 4 pixels wide, and 8 pixels high (with one blank horizontal line at the bottom on most characters)
You load-in in the sprite with the incgraphic command.
incgraphic font.png 160AAtari 7800 Basic 160A mode supports 4-color PNG files.
Next you use the charcterset command to set the name of the font graphic minus the extension,
Then use the alphachars command to tell Atari 7800 Basic which ascii characters are represented in the font graphic
 characterset font

 alphachars '0123456789abcdefghijklmnopqrstuvwxyz>`?!/.,-_()[]&AB '
These “font” characters we will be displaying are just sprites cut from the font graphic, and nothing else. That means we need to introduce the color palettes before we move on.
The Atari 7800 contains 8 programmable color palettes, each containing four colors (3 plus alpha channel). In 160A mode, a single palette is assigned when putting a sprite into the displaylist.
In 160B mode, 12-color sprites use either the first 4 or 2nd 4 palettes. We will get to that in a later lesson.
By the way, these palette are completely redefinable at execution time, which makes them very useful for color-based animations.
You define a palette like this:
  P0C1=$0F

  P0C2=$0C

  P0C3=$0A
This is the “0” palette, signified by the “0” after the P in the variable name.
$0F is white, the other two colors are shades of grey.
Now, inside our _gameLoop we can use the plotchars command to put text on the screen
plotchars 'hello world' 0 58 5There are four parameters for plotchars
- Text to display in single quotes
- The color palette to use
- The x position of the text in pixels (0-159)
- The y position in lines of text (about coarse 13 lines)
- Optional -number of characters
- Optional -doublewide
Besides text, the plotchars and the associated plotmap and other commands can be used to plot map graphics for games. These are called character graphics and while they are easy to manipulate, they have restrictions too.
Check out the Atari 7800 Basic guide for more details,
Finding the right X and Y position for text may take a few iterations. I think it took me 3 or 4 tries before it looked like “Hello World” was in the center of the screen.
When we run this code you should see a color cycling background with the words “Hello World” displayed in White over it.

Hello World Atari 7800!
Here is the full code for this step:
set zoneheight 16
 displaymode 160A
 set plotvalueonscreen on
 set romsize 32k

 incgraphic font.png 160A
 characterset font
 alphachars '0123456789abcdefghijklmnopqrstuvwxyz>`?!/.,-_()[]&AB '

 rem pallette 0 text
  P0C1=$0F
  P0C2=$0C
  P0C3=$0A


 BACKGRND=$00

 dim bgColor  = var1
 dim wait = var2

 bgColor = 0
 wait = 0

_gameLoop
 clearscreen
 wait = wait + 1
 if wait > 10 then wait = 0 : bgColor = bgColor + 1
 if bgColor > 127 then bgColor = 0
 BACKGRND = bgColor

 plotchars 'hello world' 0 58 5

 drawscreen

 goto _gameLoop
Feel the urge to support, click here (but no obligation): https://www.buymeacoffee.com/intotheverticalblank?fbclid=IwAR0ryLpAIZPgDgjZqSmMmXLVIOFKWtSDVymoPXsJoj3KsEI0x0KCQOpJMpM
You Can get the code for this and all future lessons on our GitHub:
intotheverticalblank/makeathing: Code for making things (github.com)
All Links:
Links:
Source GitHub : intotheverticalblank/makeathing: Code for making things (github.com)
7800 Graphics Modes And Sprites Tested:
Visual Studio Code: Visual Studio Code – Code Editing. Redefined
Atari 7800 Basic Github: Releases · 7800-devtools/7800basic (github.com)
AtariAge 7800 Basic Forum: 7800basic beta, the release thread – Atari 7800 Programming – AtariAge Forums
Atari 7800 Basic Guide: 7800basic Guide (randomterrain.com)
Concerto Cart: Pre-production Concerto Cartridge | Erstwhile Technologies (square.site)

Leave a comment