By Jeff D. Fulton
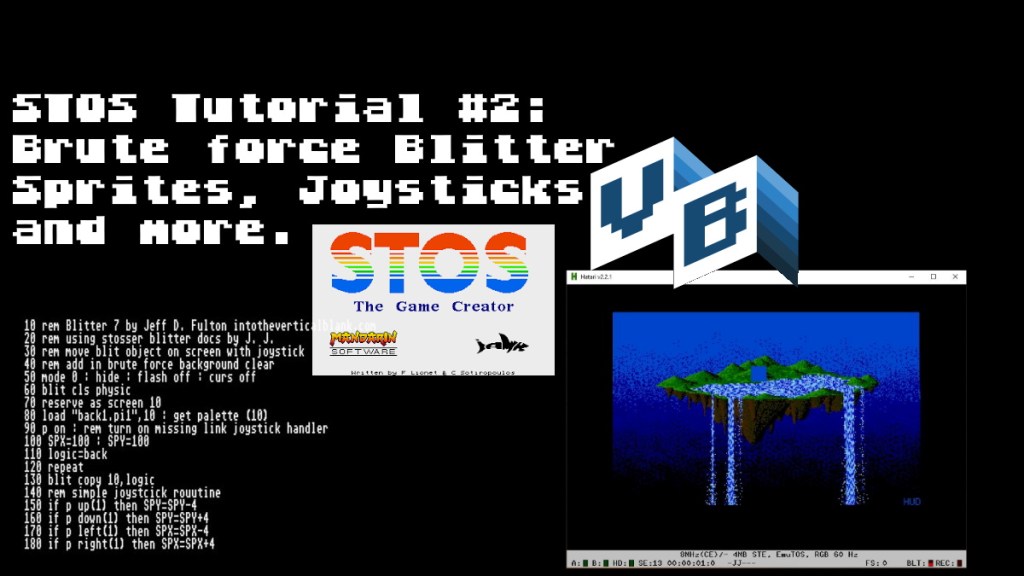
In this, STOS Tutorial #2, we will expand on what we did in Tutorial #1 by using a BRUTE FORCE method to Blit a non-destructive Sprite on to a complex background and move it with the joystick. We will be Using the Missing link Extension by Top Notch and the Blitter Extension by Asa Burrows.
If you have not taken a look at Tutorial #1, you might want to do it before you start this one. It explains how to set up a development environment just like I have it. It is not 100% necessary though, if you have more experience with STOS and want to use your own setup, just realize that you will need the Blitter and Missing Link extensions from the STOS Time Tunnel Site, at the very least to follow along. You will also need the STOS 2.08 version for download on the site.
Here is the TUTS/STE folder updated for this Tutorial. It contains Blitter1.bas through Blitter7.bas. We only covered Blitter1.bas in Tutorial #1, so we have SIX more progressively more complicated tutorials that will culminate in some what I call “Brute Force” blitting to display a complex background and a non-destructive Sprite on top, moving freely with the joystick.
Companion Video
BRUTE FORCE Blitting?
Don’t look this term up, I just made it up. There are a lot of “brute force” techniques in programming. I am calling the type of Blitter operations in this tutorial “Brute Force” because we are going to be using the easiest, most non-optimized methods to add a background and a sprite to our STOS screen. The Blitter extension offers 2 methods to move bytes to the screen. The first (our Brute force techniques) uses a function that encapsulates that blitter capabilities and lets use use a fool-proof method to get a sprite on the screen. By the wat, these are NOT hardware sprites. Even with the Blitter,
The ST has no Hardware sprites, so we must also remove our background on every frame and replace it to create the illusion of a non-destructive sprite. We are also doing this with a simple but powerful command, and with a RECTANGLE sprite. This means that we don’t need to worry about transparence (YET). In the next Tutorial we will cover more elegant methods to get an animated character onto the screen over a complex background.
As we go along I will be using the terms sprite, “sprite”, blitter sprite and blit sprite interchangeably. They all mean the same thing. A simulated sprite that we are placing on to the physical screen using the blitter extension.
Blitter2.bas – Simple Blit of a section of of screen to the Physical Screen

This is almost identical to the Blitter1.bas example from Tutorial #1, but it copies a section of screen 10 to the physical output screen rather than the copying all of screen 10.
If you need a refresher of anything STOS language related, on environment setup, how Blitter1.bas works, etc, please take a look at Tutotial#1. I am only going to cover the new commands and functions and won’t necessarily being going over too many previously covered topics. I will be going slow though, so don’t worry about getting lost.
There is a working version of each of these tutorial files in the download for Tutorial #2. You can load that in an run it, or better yet, type the code in from the above listing, which, for me personally, is a better way to learn.
So, what have we changed.
In line 60, we have changed the blit copy operation to a partial pixel copy from screen 10 to the physicals screen using this method of the Blitter extension:
BLIT COPY source,x1,y1,x2,y2,destination,x,y
60 blit copy 10,0,0,160,100.physic,80,50So line 60 might seem pretty simple, and it is, but it is actually more powerful than ANY STOS command for putting an item on to the Physical Screen. Why? Because the ST internal memory map, and by definition STOS usually MUST copy and paint back pixels at 16 pixel horizontal boundaries (0,15,31,) etc. You might notice that there are screen copy commands in STOS that look very similar to those in the Blitter extension, BUT, those must COPY from and Draw to 16 pixel Horizontal boundaries. STOS Sprites fix this limitation of the language by actually moving all of the memory over from the 16 pixel boundary to the exact horizontal position you desire. The problem is, this is a SLOW operation. This is called “transposition” of the Horizontal coordinates. With The Blitter operations we don’t have to do thus at all.
The Blitter (and Missing link, which is highly optimized but uses a different method that works without the blitter) must COPY FROM a 16 pixel boundary position on the source screen, BUT can draw to the physical screen at any horizontal location
So, now that we can copy a section of screen 10 and place it anywhere on the physical screen with a simple blitter operation, we can create sprites! (well a simulation of sprites at least).
Blitter3.bas Move a Blit Object on the screen with a joystick
For this example we are going to be using the Missing Link extension Joystick Routines because they are faster than the standard STOS versions. This is the first of our examples has a code listing that will not fit on a single ST screen, so we are going to start breaking them up into pages that consist of about 10-15 lines each for display. The command the to list STOS basic code by a range is :
LIST XX – XX or in the case of the next screen LIST 10 – 100.
Note on keyboards and the “-“. On my USA Windows keyboard in Hatari, the normal “-” key displays a “/”. I have to use the “-” from the numeric key pad. If you know of a mapping other than this, please leave a comment. It be a good will help for people using smaller keyboards that might not have a second “-” on a numeric keypad.
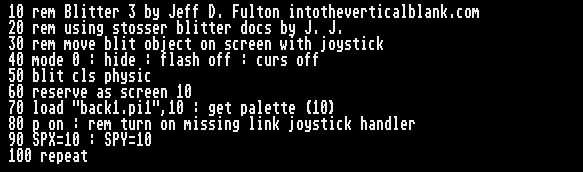
New lines and and changes:
80 p onThe Missing Link joystick handler is turned on with P ON. Yes, this is funny, because it really should be “P START” and P ON is hilarious, so have a laugh! To turn if off, you use P STOP. Note that P ON TURNS OFF THE MOUSE! This is important because if you have the need to use “CTRL-C” to stop a program before P STOP is called, the mouse will not function. Just type P STOP into the interpreter and it will stop and give you the mouse back.
90 SPX=10 : SPY=10;These variables hold the current x and y coordinates ( the upper left corner) of the sprite we want to move around the screen. So we will no long blit to a fixed position, but blit based on joystick movement.
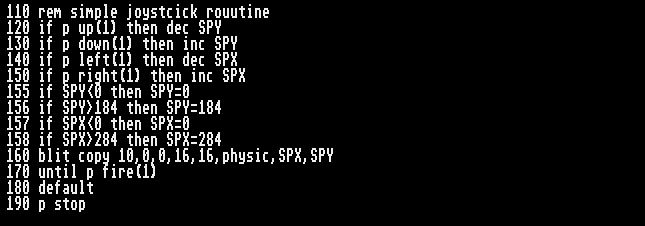
100 repeatAhh REPEAT … UNTIL this is this loop we are going to use for this example. We need a loop so we can check the joystick, update SPX and SPY accordingly, and blit our sprite to the physical screen. The UNTIL is not listed here because it comes on line 170. So let’s look at the final lines now.
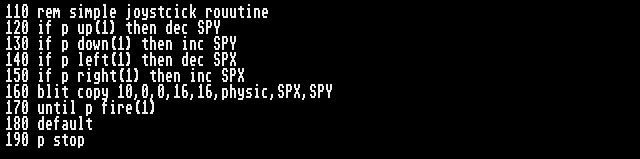
120 if p up(1) then dec SPY
130 if p down(1) then inc spy
140 if p left (1) then dec spx
150 if p right (1) then inc spy
160 blit copy 10,0,0,16,16,physic,SPX,SPY
170 until p fire(1)
...
190 p stop
These are our joystick checks inside the repeat construct. We can use the ultra fast, inc and dec to update our SPX and SPY variables because we are only moving the “SPRITE” on pixel in any direction on a joystick press.
Line 160 we have seen a few times before, we are now copying the top left corner (a blue rectangle) to the physical screen based on the SPX and SPY values
Line 170 – Since the mouse is turned off when the joystick is turn on using the Missing Lnk extension, we have to check for the joystick button press to exit rather than a mouse press. This completes our REPEAT … UNTIL routine.
Line 190 stops the Missing Link Joystick routine from running and turns the mouse back on.

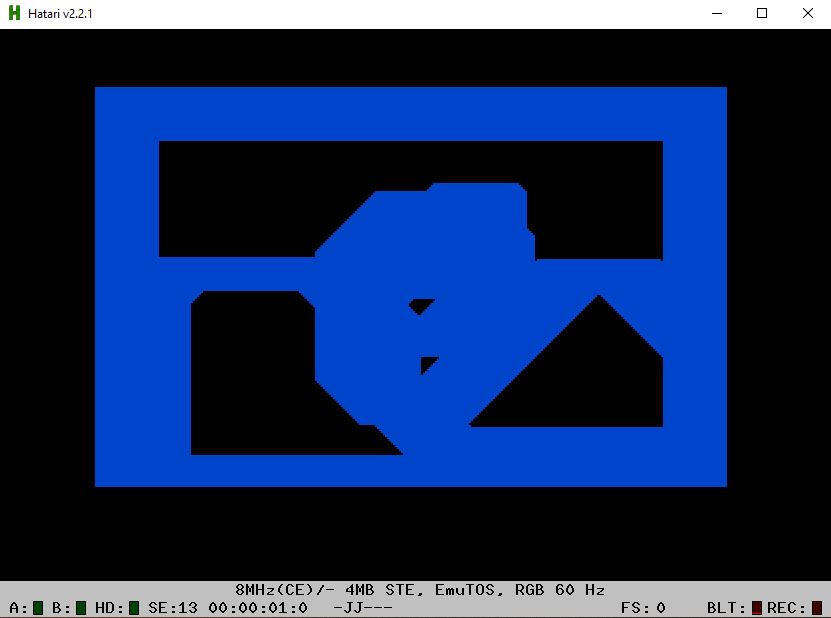
When you “run” this code, you will be presented with a blue rectangle in the top left corner of the ST screen. If you move the joystick, it will start to paint the screen blue with the trail the “sprite” leaves behind and it will do it REALLY fast.
Also, notice that if the “sprite” leaves the screen we get an illegal functional call in out BLIT COPY command because the blitter cannot change vales at memory locations that don’t exist. In the next example we will fix that. Also, notice the SPEED. It moves FAST, even at the slowest possible update rate, one pixel at a time. This is because we are NOT timing yet 50hz using the vertical blank and just letting the blitter run as fast as is can. It’s pretty fast, but for it to work with other parts of STOS, we will have to slow it down a bit.
NOTE: use the default command and then the p stop to get the editor back to normal after this error occurs.
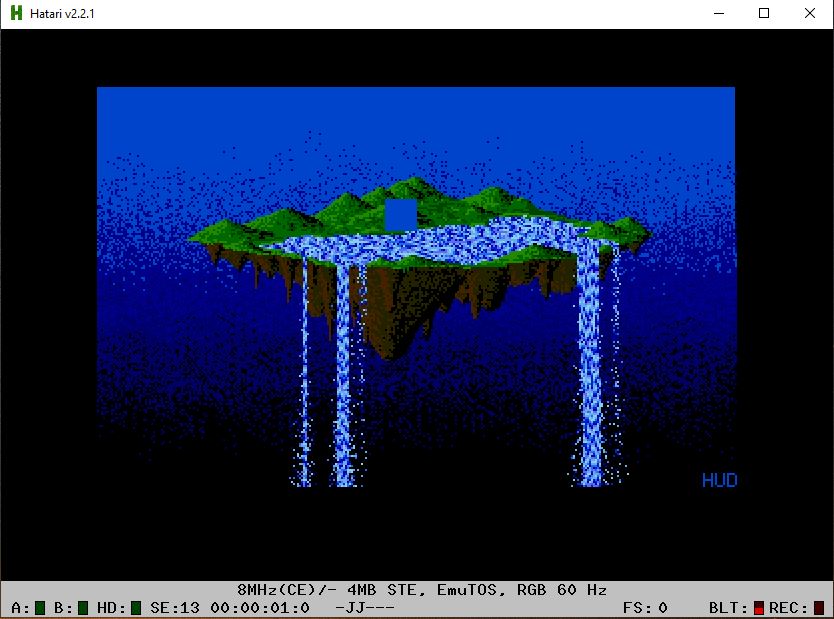
When this program is idle (but running), take a look at the HATARI lower right hand corner, you will see the BLT indicator show RED movement. This indicates that the blitter is running. We can use this as a blitter throughput indicator. When that indicator is COMPLETELY RED the blitter is being use to it’s max.
Blitter4.bas Move Blit object and add in boundary check
This is very similar to Blitter3.bas except we are going to make sure that we don’t cause any runtime exception errors by trying to draw outside of the screen ram.

We have not made any changes to the first 10 lines except in the REM statements for the program description.
In this we’ve added some lines starting at 155 to check the position of the blit sprite position and stop it from moving out of addressable screen ram, thus causing a run-time exception.
155 if SPY <0 then SPY=0
156 if SPY > 184 then SPY =184
157 if SPX <0 then SPX =0
158 if SPX > 284 then SPX = 284
First off, of you don’t like the numbering (which I find atrocious and should be fixed in the next example), just type in the renum command into the editor window and those will be fixed to multiple of 10.
So, our sprite is 16×16 and the upper left corner is used to position it to draw. Because of that, we CANNOT have with SPX or SPY start drawing as -1 or lower, so if those are found to be less than 0, we set them to 0. For the extreme lower position of SPY, I have checked it at 184 and set it to 184 if it is greater than 184. This value can also be 185 I’m pretty sure so you can change it and test it if you world like. The 284 for the extreme right side of the screen, like the SPY extreme lower position is 300 – 16 (284). We might be able change to the 285 and we’ll test this and the SPY 285 in the next section.
Note: Yes, I just I now am aware that the the extreme right-hand side of the low res ST screen is 320 not 300. That will be fixed below in following sections of this tutorial.
I checked this and 185 and 285 work perfectly also. I think the documentation for the blitter says that X2 and Y2 are positions when copying from the source screen and not a length and width. If so our 16×16 might be a 17×17 and we might have to adjust along the way. Some of the documentation for these extensions is not quite as clear as I would like it to be, but experimentation is fun too =)
Blitter5.bas – add in A Brute force sprite removal with screen clear
Note, of course the ST low res screen is 320 x 200 not 300 x 200, That’s why we were not going off to the full right-hand side of the screen in the last example. We have fixed that here and have also looked up various docs to find that the x2 and y2 values for the copy from in the blit command are NOT length and width but an actual pixel coordinate, we have adjusted those here.
We will demonstrate these changes in detail as we go through the rest of the code examples.
In Blitter5.bas we are going to add in code to erase the screen on each frame before re-drawing our newly positioned blit sprite. We have also re-numbered the code listing. You will notice that we are still drawing to the physical output screen, “physic”, directly and this will cause flicker that we will fix in Blitter6.bas later in this tutorial.

Not a lot has changed in these in blitter5.bas line 10-100. We have simply updated the rem statements to reflect the new description
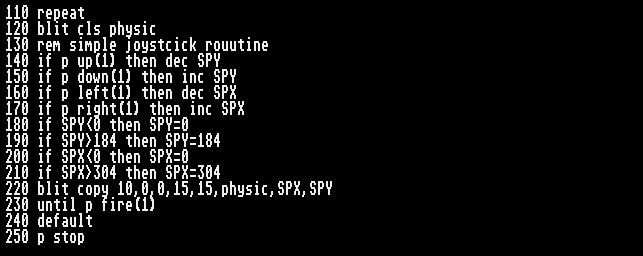
Here we some adjustments and changes from Blitter4,bas. We have renumbered the lines and also have set the x2 and y2 coordinates of our blit copy source position to be 15,15 rather than 16,16.
0,0 to 15,15 is actually a 16×16 block. I had thought that the second parameter was a length and width, but that doesn’t see to be the case from what I have read.
The only band new line we have is line 120
120 blit cls physicThis forces the blitter chip to “brute force” a screen clean by putting a 0 in all of the memory locations for the screen on every frame. The blitter chip does this pretty quickly, but you will noitce a flicker when you run this. This is because we have been writing directly to the Physical screen address, “physic”. To get rid of the flicker, we will need to add a few more lines of code in Blitter6,bas to do some off screen updates with what can be called “blit indirection”
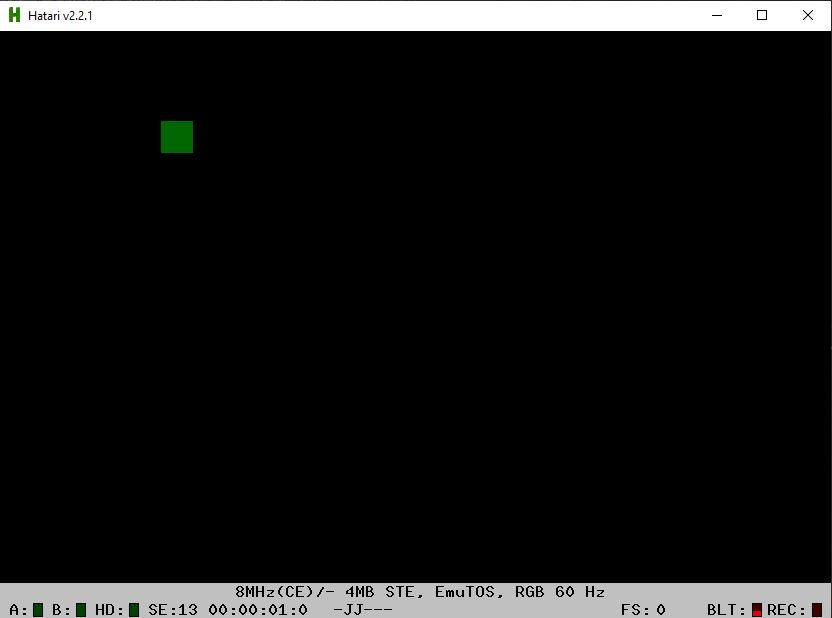
The square looks green because we are drawing directly to the ST screen. When we do this, you will see each of the blit planes being draw separately. There is a blit plane for each red, green, and blue. In the image above, we caught it as it was drawing the green bit plane.
Blitter6.bas add in Screen swap, wait vbl and blitter in use check
If you have been waiting for the magic to really happen, you will start to see it in the last two examples. By the end of these two you will have the ability to blit a sprite onto both a black and a complex background. Now, our spite is a filled rectangle (well, it’s technically a square), so we are not handling transparency yet, but we will get to that in tutorial #3. if you want to look it up, the Asa Burrow extension docs explain the various screen draw operations for merging image pixels during drawing operations.
Just like Blitter5.bas, we are not making many changes to Blitter6.bas line 10 – 100, except to some of the rem statements.

Starting at line 110, things start to get more interesting. Let’s take a look.
The line numbers in blitte6.bas have shifted down so we can add in a new line, 110.
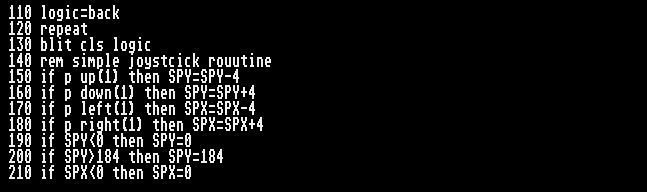
110 logic=backWhat’s this? Why logic = back? We are now going to be using “indirection” for our drawing. This means that we will be drawing on to a logical screen (hidden from the user) and then swapping the physical screen for it on each frame. But why logic = back in our setup before the repeat starts? This has more to do with STOS than the ST. STOS has three screens that is uses for it’s normal operations. The logic and physic are used for precisely what we are going to use them for, namely, we are going to draw onto the logic first and swap it one time with a simple set of built-in STOS commands. But what about the SPRITE background, “back”? We are going to set logic = back so the logic screen, which we don’t need, will just be a reference to the background screen. Neither of these is visible until the are swapped with the physical screen. It sounds overly complicated, but it’s actually very simple. Logic and back and now the same memory location and since they are hidden, we can just write to logic because the screen swap command always swap logic for physic, it cannot swap back for physic.
What else did I change? Well I removed the inc and dec operators so I could add 4 instead of 1 to the movement on each joystick press. The reason for this is that we are now going to be timing our screen updates to run 1/50th of a second in each vertical blank interval. This will give us the appearance that our sprite is running slower than the 1 pixel movement not timed to the VBL (vertical blank), but this only because we need proper timing in our games. As we get more elaborate with our logic we don’t want screen updates to occur out of sync with our code. Instead of letting the blitter and screen swaps run as fast as possible on our single sprite, we are going to spread the timing evenly so when we get more complicated applications with more logic and moving object we’ll have a smoother running game.
150 if p up(1) then SPY = SPY - 4
160 if p down(1) then SPY = SPY +4
170 if p left (1) then SPX = SPX -4
180 if p right (1) then inc SPX = SPX +4
Ok, let’s get down to business…let’s go INTO THE VERICAL BLANK so to speak.
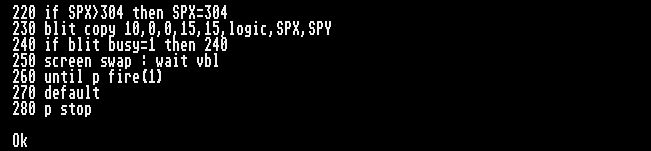
So here is where the magic happens, The only new lines, 240 and 250 give us smooth updating blue box sprite.
240 if blit busy =1 then 240
250 screen swap : wait vbl
In line 240 we make sure that all blitter operations are complete before we move on. This is important as we can put a lot of other logic after the blit copy command(s) and before line 250 where we swap the screen, but in the background the blitter will be working on the logic screen. If we don’t give it enough time to do its work, we well get errors and even crashes to the blitter.
In line 250 we are telling STOS to swap the logic screen address with the physic screen address. and then we wait for the the vertical blank before moving on to the next iteration of the repeat loop.

Blitter7.bas add in a brute for a complex background clear / replace
By swapping out our Blit cls logic on each frame with a command to blit the full background image to logic instead, we remove the simple screen clear and replace it with a complex background. We are only making a couple simple changes to the code, but here is the complete listing to examine first:
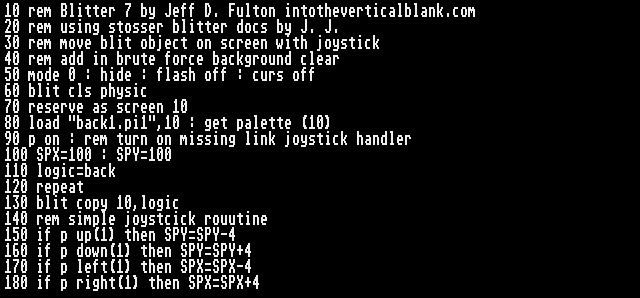
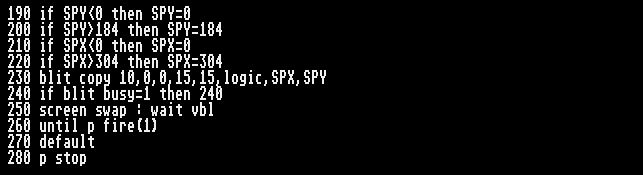
We really have only changed 2 lines lines in this version, but those 2 lines do a lot. Well, actually only one of the lines (130) does A LOT, the other line (100) just puts our sprite blue square in spot where it isn’t the same color as the back ground.
100 SPX=100: SPY=100 This is just setting the start x and y coordinates for our “sprite” to a better location so it is over a green part of he background and thus not “hidden” in the upper corner where it was copied from.
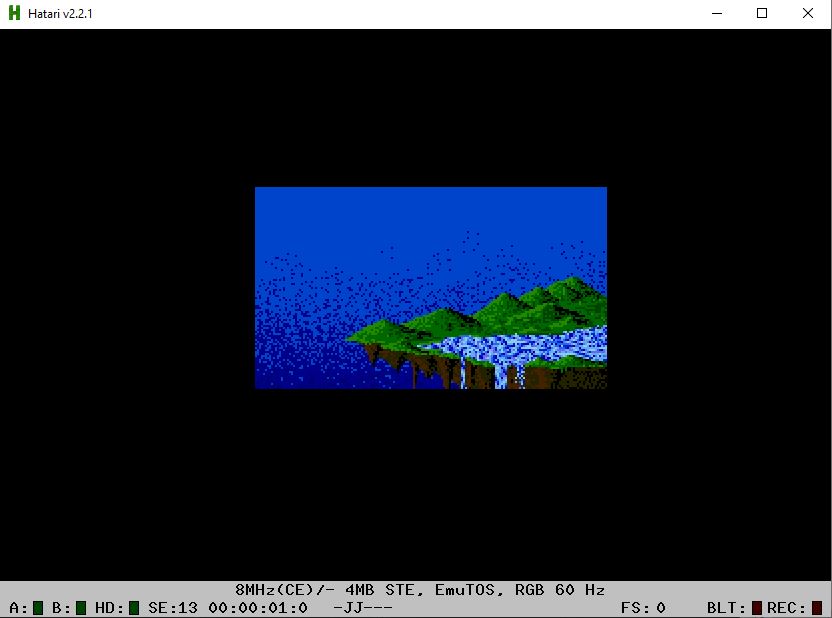
130 blit copy 10, logicSo, what we are doing now is taking the entire screen stored in data bank 10 and using the Blitter to fill in the screen on each frame, We are effectively using the background as a big eraser to remove our sprite, re-draw the background and then re-draw the sprite again in our repeat until loop.
So, there you have it, we started really basic and now we have enough logic at out disposal to use some simple blitter commands for moving “sprites” as if they are non-destructive against a complex background.
Beyond Brute Force
This is BRUTE force because we *could* copy the background from screen 10 to only the places on the screen that have changed. We will explore that and more next time in STOS Blitter Tutorial #3.

Leave a comment